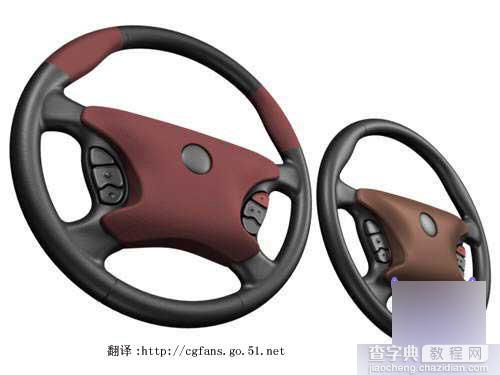
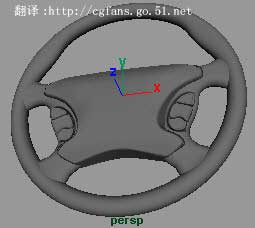
今天小编为大家分享Maya Nurbs汽车方向盘建模教程,教程真的很不错,值得大家学习,一起来看看吧!
翻译说明: 为了让大家更能理解这个教程,我并不翻译其中一些命令,这样可以让一些初学者 ( 不是很熟悉 maya nurbs 建模命令 ) 更快找到这些命令。
希望可以和大家一同进步!!!!!
from front view, create this profile curve (fig 1), and move it to -0.95 of z axis. in this case, i use a measurement of around 5.7 cm (fig 2). use the create measure tools distance tool to check the distance.
在前视窗里创建轮廓曲线 (fig 1), 并在 z 轴方向上移动约 -0.95. 在这个教程里,我的尺寸约为 5.7 cm(fig 2). 你可以使用 create measure tools distance tool 来检查你的尺寸 .
fig 1
fig 2
from side view, duplicate this curve and move the new curve to 0.951 of z axis (fig 3), then tweak this new curves cvs into this shape (fig 4), so it looks smaller than the original.
在侧视图复制曲线,并在 z 轴方向上移动约为 0.951(fig 3), 然后将新复制的曲线移动各 cv 点使其形状像 (fig 4) 所示,可以看出它比原来的曲线轮廓要小。
fig 3

fig 4

Next,selectthe 2 curves and go to surface loft (fig 5). OK. Next create a NURBS cylinder with radius 2, height ratio 3, sections 20, spans 12 (fig 6).
接下来,选择这两条曲线并 surface loft (fig 5). Ok. 创建一个 Nurbs 圆柱体,半径为 2 ,高为 3 , sections 为 20,span 为 12(fig 6).
fig 5
fig 6

Now from side view, rescale the Z value to 0.216 (fig7). Next...click theselectby component type button

, go to front view andselectthese center CVs (see fig 8).
回到侧视窗,将圆柱体的 z 轴方向缩小到 0.216(fig 7). 接下来选择中间的一些 CV 点 (fig 8).
fig 7

fig 8
fig 3
fig 4
next,selectthe 2 curves and go to surface loft (fig 5). ok. next create a nurbs cylinder with radius 2, height ratio 3, sections 20, spans 12 (fig 6).
接下来,选择这两条曲线并 surface loft (fig 5). ok. 创建一个 nurbs 圆柱体,半径为 2 ,高为 3 , sections 为 20,span 为 12(fig 6).
fig 5

fig 6
now from side view, rescale the z value to 0.216 (fig7). next...click theselectby component type button

, go to front view andselectthese center cvs (see fig 8).
回到侧视窗,将圆柱体的 z 轴方向缩小到 0.216(fig 7). 接下来选择中间的一些 cv 点 (fig 8).
fig 7

fig 8
now move the selected cvs to 1.433 of z axis (fig 9), you can see the cvs axis value in the cvs panel (right side).
将它们在 z 轴方向上移动约 1.433 的距离,你可以在右边通道栏里看到数值 .
fig 9
next,selectyour lofted object, shift-select the cylinder, go to edit nurbs surface fillet circular fillet option box and apply these settings (fig 10). note : use 0.0010 for positional tolerance for betterfillet tolerance, hit fillet, then youll have this figure (fig 11).
接下来,选择你 loft 成的曲面,按 shift 键选择圆柱体,到 edit nurbs surface fillet circular fillet option box 选项框里运用这个设置 (fig 10).
记住 : 使用 0.0010 的数值给 positional tolerance ,这样你就可以得到 (fig 11).
fig 10
fig 11

next,selectthe cylinder, go to edit nurbs trim tools ,selectoneof the white trim areas (fig 12), rotate your camera view to back side,andselectback center area (fig 13) then hit enter.
接下来,选择圆柱体,到 edit nurbs trim tools, 选择要保留的曲面区域,如 (fig 12)(fig 13) 所示,然后 trim 它。
fig 12
fig 13
next,selectthe lofted object, go to edit nurbs trim tools ,selectone of center top areas (fig 14) then hit enter (fig 15).
选择 loft 出来的曲面,到 edit nurbs trim tools, 选择要保留的曲面区域,如 (fig 14)(fig 15) 所示,然后 trim 它。
fig 14
fig 15
next from front view, create a nurbs torus with radius 3.8, sections 22, height ratio 0.08, rotate it to 90%26deg; of x axis (fig 16), thenselectthese 4 cvs and rescale them a little bit towards the center (use left manipulator to rescale them) (fig 17).
回到前视窗,创建一个 nurbs 圆环,半径为 3.8,section 为 22 , hight ratio 为 0.08, 并在 x 轴方向上旋转 90 度 (fig 16), 选择这 4 个 cv 点并将它们向中心方向拉伸一点 .(fig 17)
fig 16
fig 17
next, create a nurbs circle with 18 spans, rotate it to around -41.676%26deg; of z axis and rescale to 0.238 of z scale, translate it to -2.484 of x axis and -2.736 of y axis (fig 18). next, you need to duplicate and rotate this curve several times towards the top left side and tweak some cvs (see fig 19).
接下平,创建一个 nurbs 圆曲线, span 为 18, 并在 z 轴方向上旋转 -41.676 度,并将 z 轴方向缩小到 0.238, 在 x 轴方向上移动到 -2.484 , y 轴移动到 -2.736(fig 18). 接下来你需要复制一些曲线并旋转移动到 (fig 19) ,适当移动它们的一些 cv 点。
fig 18
fig 19
next,selectall of these curves sequentially and go to surface loft (fig 20). next create a nurbs cylinder with 16 sections, 4 spans, height ratio 2, rotate it to 90 of x axis, scale it 0.462 of x axis, rotate it to around 30.818%26deg; of z axis, and then rescale one row ofthe outer cvs. rescale them very small until it looks like they are touching each other (fig21).按顺序选择这些曲线并 surface loft (fig 20). 接下来创建一个 nurbs 圆柱体, sections 16 , 4spans, height ratio 2, 并在 x 轴方向上旋转 90 度 ,x 轴方向上缩小到 0.462, 在 y 轴方向上旋转 30.818 度,并拉伸一些 cv 点到看上去都接触到一起。
fig 20
fig 21
next, put this new cylinder to the half side of the new lofted object at this position (fig 22), heres the front view (fig 23). this cylinder will cut out half of the lofted object (for button place area).
接下来将这个圆柱体移动到新 loft 曲面附近 (fig 22) ,前视窗中如 (fig 23).
fig 22

fig 23
next,selectthe cylinder, shift-select the lofted object, then go to edit nurbs surface fillet circular fillet option box and apply these settings (fig24), then you will have a new fillet area (fig 25).
接下来,选择这个圆柱体,按 shift 键选择 loft 物体,到 edit nurbs surface fillet circular fillet option box 运用这一选项,你将可以得到如 (fig 25).fig 24
fig 25
nextselectthe cylinder and go to edit nurbs trim tools ,selectthe inside of the cylinder white area (fig 26) and hit enter (fig 27).
接下来选择圆柱体并 edit nurbs trim tools 它,选择要保留的区域 (fig 26),trim 后得到 (fig 27).
fig 26
fig 27
nextselectthe lofted object and go to edit nurbs trim tools ,selectthe outside of the lofted object white area (fig 28) and hit enter (fig 29)
接着我们再 edit nurbs trim tools 那个 loft 出来的曲面,选择要保留的区域如 (fig 28), 并 trim 得到 (fig 29).
fig 28
fig 29
now go to edit selectall by type nurbs surfaces , then go to the rendering module, go to render set nurbs tessellation option box and apply these settings (fig 30), then hit set and close.
到 edit selectall by type nurbs surfaces , rendering module , 进入 render set nurbs tessellation option box 设置如 (fig 30) 点击 set and close.
fig 30
next from front view, create these button profile curves (fig 31), duplicate every profile curve several times, and rescale the last curve into a smaller proportional curve (fig 32).
回到前视窗,创建如 (fig 31) 所示的曲线,复制并移动如 (fig 32), 并将最后的一条曲线缩小一点 .
note : you could create your own button profile if you want to.
你可以自己创建你喜欢的曲线。
fig 31
fig 32

next,selectevery set of them (sequently), then go to surface loft(fig 33), thenselectevery top curve then go to surface planar to close the buttons top areas, and do some variation with the curves (fig 34).
接下来,按顺序选择这些曲线并 surface loft (fig 33) , 依此选择每条最后的曲线并 surface planar 以闭合这些曲面 (fig 34).
fig 33
fig 34
now go to display hide hide geometry nurbs curves , to hide all of your curves, thenselectall of these buttons then drag them to their places (fig 35). next from front view,selectall center objects then hide them (by pressing ctrl-h) (fig 36).
隐藏 nurbs 曲线,命令 display hide hide geometry nurbs curves , 将这些曲面移动到如 (fig 35). 回到前视窗,选择中心的物体并隐藏它们 ( 按 ctrl h)(fig 36).
fig 35
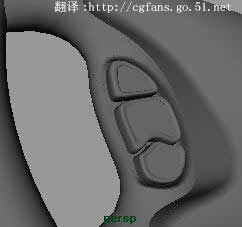
fig 36
thenselectall the objects (not the main torus), then go to edit group . hit group... wait while maya is calculating group. when finished, go to edit duplicate option box , then apply these settings (fig 37), then you will have a mirrored object on the other side (fig 38).
选择那些物体 ( 不包含主要的圆环 ), 用 edit group 成组 . 成组后,复制它,选项如 (fig 37). 复制后如 (fig 38).
fig 37
fig 38
now go to display show show geometry nurbs surfaces , to show all of your nurbs geometry, then you should have these objects at this point(fig39).
然后将所有的 nurbs 曲面显示出来,命令 display show show geometry nurbs surfaces . 得到 (fig 39)
fig 39
next to smooth the connection between the center object and the main torus we need to fillet them together.selectthe left lofted object, shift-select main torus, then go to edit nurbs surface fillet circular fillet option box and apply these settings (fig 40), then you will have this (fig 41).
我们需要在大圆环和握手柄之间得到更圆滑的过渡,选择握手柄再按住 shift 键选择大圆环, edit nurbs surface fillet circular fillet option box , 选项如 (fig 40), 得到 circular fillet 结果如(fig 41).
fig 40
fig 41
do the same step with the right lofted object, remember : to circular fillet the right side object, you must turn on reverse primary surface normals.
以同样的方式 circular fillet 右过的握手柄,记住:在 circular fillet 右边时,要打开 reverse primary surface normals 选项。(完)
教程结束,以上就是Maya Nurbs汽车方向盘建模教程,希望这篇文章能对大家有所帮助!
【Maya Nurbs汽车方向盘建模教程】相关文章: