本篇效果利用HTML、CSS和Jq实现的图片点击预览功能,在预览时也可以点击切换图片。图片1为整体效果,图片2是点击图片1后出现被点击图片的预览图片的名称以及说明。
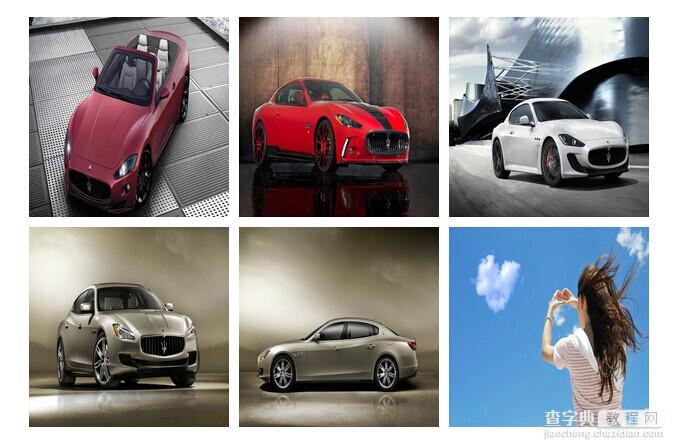
图片1
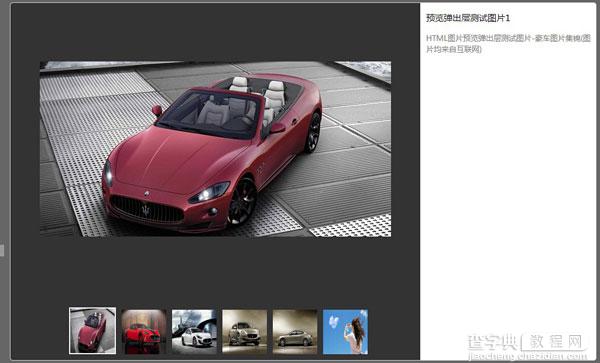
图片2
实现的代码:
html代码:
XML/HTML Code复制内容到剪贴板 <divid="ImageMain"><imgsrc="1img1.jpg"/><imgsrc="1img2.jpg"/><imgsrc="1img3.jpg"/><imgsrc="1img4.jpg"/><imgsrc="1img5.jpg"/><imgsrc="1img6.jpg"/></div> <divid="ImageScaBg"></div> <divid="ImageSca"> <divid="ImageContainer"> <imgid="imgCenter"src="1img3.jpg"/> <divid="imgLunbo"><imgclass="imgLunboItem"src="1img1.jpg"/></div> </div> <divid="ImageInfo"> <h3id="imgName"></h3> <pid="imgInfo"></p> </div> </div>
css3代码:
CSS Code复制内容到剪贴板 #ImageMain{ width:630px; height:500px; margin:0auto; margin-top:100px; } #ImageMain>img{ width:200px; height:200px; cursor:pointer; float:left; margin-left:10px; margin-top:10px; } #ImageMain>img:hover{ opacity:0.8; } #ImageScaBg{ position:fixed; background-color:#000; top:0px; left:0px; opacity:0.6; width:100%; height:100%; display:none; } #ImageSca{ position:absolute; background-color:#333; border:1pxsolid#ccc; -webkit-border-radius:5px; -moz-border-radius:5px; border-radius:5px; display:none; } #ImageContainer{ float:left; text-align:center; } #ImageInfo{ float:left; width:300px; background-color:#fff; -webkit-border-radius:03px3px0; -moz-border-radius:03px3px0; border-radius:03px3px0; } #imgName{ font:15px"微软雅黑",Arial,Helvetica,sans-serif; padding-left:10px; font-weight:500px; } #imgInfo{ font:13px"微软雅黑",Arial,Helvetica,sans-serif; padding-left:10px; color:#808080; } #imgLunbo{ height:80px; position:absolute; margin-left:50px; } .imgLunboItem{ width:76px; height:76px; margin-left:10px; }
JQ的代码:
复制内容到剪贴板 varImageScaHandler={ ImageMaxWidth:800, ImageMaxHeight:600, ImagePathJson:[{imgName:"预览弹出层测试图片1",imgPath:"1img1.jpg",imgInfo:"HTML图片预览弹出层测试图片-豪车图片集锦(图片均来自互联网)"}, {imgName:"预览弹出层测试图片2",imgPath:"1img2.jpg",imgInfo:"HTML图片预览弹出层测试图片-豪车图片集锦(图片均来自互联网)"}, {imgName:"预览弹出层测试图片3",imgPath:"1img3.jpg",imgInfo:"HTML图片预览弹出层测试图片-豪车图片集锦(图片均来自互联网)"}, {imgName:"预览弹出层测试图片4",imgPath:"1img4.jpg",imgInfo:"HTML图片预览弹出层测试图片-豪车图片集锦(图片均来自互联网)"}, {imgName:"预览弹出层测试图片5",imgPath:"1img5.jpg",imgInfo:"HTML图片预览弹出层测试图片-豪车图片集锦(图片均来自互联网)"}, {imgName:"预览弹出层测试图片6",imgPath:"1img6.jpg",imgInfo:"HTML图片预览弹出层测试图片-豪车图片集锦(图片均来自互联网)"} ], Init:function(){ $("#ImageSca").css("width",ImageScaHandler.ImageMaxWidth200"px"); $("#ImageSca").css("height",ImageScaHandler.ImageMaxHeight10"px"); $("#ImageSca").css("top",($(window).height()-$("#ImageSca").height())/2"px"); $("#ImageSca").css("left",($(window).width()-$("#ImageSca").width())/2"px"); $("#ImageContainer").css("width",$("#ImageSca").width()-300"px").css("height",$("#ImageSca").height()); $("#imgLunbo").css("width",$("#ImageSca").width()-300-100"px").css("top",$("#ImageSca").height()-90"px"); $("#ImageInfo").css("height",$("#ImageSca").height()); $("#ImageMain>img").click(function(){ ImageScaHandler.ChangeImage($(this)); }); ImageScaHandler.GetImage(); $("#ImageSca").click(function(event){ event.stopPropagation(); }); $("#ImageScaBg").click(function(event){ ImageScaHandler.Hide(); }); }, Show:function(){ $("#ImageSca").css("display","block"); $("#ImageScaBg").css("display","block"); }, Hide:function(){ $("#ImageSca").css("display","none"); $("#ImageScaBg").css("display","none"); }, GetImage:function(){ $("#imgLunbo").children().remove(); for(vari=0;i<ImageScaHandler.ImagePathJson.length;i){ varmImage=document.createElement("img"); mImage.className="imgLunboItem"; mImage.src=ImageScaHandler.ImagePathJson[i].imgPath; $("#imgLunbo").append(mImage); mImage.onclick=function(){ $(".imgLunboItem").css("border","0pxsolid#000"); ImageScaHandler.ChangeImage($(this)); } } }, ChangeImage:function(target){ $("#ImageContainer>img").attr("src",$(target).attr("src")); $("#ImageContainer>img").css("margin-top",100"px"); ImageScaHandler.Show(); $(".imgLunboItem").css("border","0pxsolid#000"); for(vari=0;i<ImageScaHandler.ImagePathJson.length;i){ if(ImageScaHandler.ImagePathJson[i].imgPath==$(target).attr("src")){ $("#imgName").html(ImageScaHandler.ImagePathJson[i].imgName); $("#imgInfo").html(ImageScaHandler.ImagePathJson[i].imgInfo); $($(".imgLunboItem")[i]).css("border","2pxsolid#efefef"); } } } }
以上就是利用HTML、CSS和Jq实现的图片点击预览功能,谢谢阅读,希望能帮到大家,请继续关注查字典教程网,我们会努力分享更多优秀的文章。
【利用HTML、CSS实现的图片预览弹出层的教程】相关文章: