在线演示
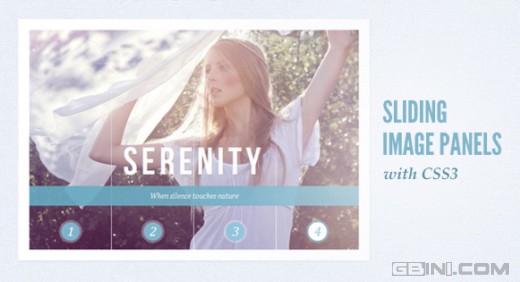
这个教程将介绍如何使用纯CSS创建一个干净的幻灯图片面板。主要想法是在面板中使用背景图片,然后在点击标签后使之动画。
HTML标签
HTML主要包括了3个主要部分:radio按钮和标签,容器,及其标题,如下:
<section class="cr-container">
<!-- radio buttons and labels -->
<input id="select-img-1" name="radio-set-1" type="radio" class="cr-selector-img-1" checked/>
<label for="select-img-1" class="cr-label-img-1">1</label>
<input id="select-img-2" name="radio-set-1" type="radio" class="cr-selector-img-2" />
<label for="select-img-2" class="cr-label-img-2">2</label>
<input id="select-img-3" name="radio-set-1" type="radio" class="cr-selector-img-3" />
<label for="select-img-3" class="cr-label-img-3">3</label>
<input id="select-img-4" name="radio-set-1" type="radio" class="cr-selector-img-4" />
<label for="select-img-4" class="cr-label-img-4">4</label>
<div class="clr"></div>
<!-- panels -->
<div class="cr-bgimg">
<div>
<span>Slice 1 - Image 1</span>
<span>Slice 1 - Image 2</span>
<span>Slice 1 - Image 3</span>
<span>Slice 1 - Image 4</span>
</div>
<div>
<span>Slice 2 - Image 1</span>
<span>Slice 2 - Image 2</span>
<span>Slice 2 - Image 3</span>
<span>Slice 2 - Image 4</span>
</div>
<div>
<span>Slice 3 - Image 1</span>
<span>Slice 3 - Image 2</span>
<span>Slice 3 - Image 3</span>
<span>Slice 3 - Image 4</span>
</div>
<div>
<span>Slice 4 - Image 1</span>
<span>Slice 4 - Image 2</span>
<span>Slice 4 - Image 3</span>
<span>Slice 4 - Image 4</span>
</div>
</div>
<!-- titles -->
<div class="cr-titles">
<h3>
<span>Serendipity</span>
<span>What you've been dreaming of</span>
</h3>
<h3>
<span>Adventure</span>
<span>Where the fun begins</span>
</h3>
<h3>
<span>Nature</span>
<span>Unforgettable eperiences</span>
</h3>
<h3>
<span>Serenity</span>
<span>When silence touches nature</span>
</h3>
</div>
</section>
CSS样式
主要的目地是先通过label来隐藏radio按钮。点击label后将会使得分开的checkbox或者radio按钮选择。给input一个ID,我们可以使用for=idref属性。
第二我们希望将所有的背景图片放置正确,第三,我们希望点击label的时候显示分开的图片切割线和标题。
首先,我们设计section样式,并且给与一个白色边框及其box阴影
.cr-container{ width: 600px; height: 400px; position:relative; margin: 0 auto; border: 20px solid #fff; box-shadow: 1px 1px 3px rgba(0,0,0,0.1);}
因为我们使用一般的sibling selector来取得正确的图片块和标题,我们需要在容器前放置label。我们需要确认他们处于层次的顶端(z-index),并且通过添加一个top maring来将位置拉低
.cr-container label{ font-style:italic; width:150px; height: 30px; cursor: pointer; color:#fff; line-height: 32px; font-size: 24px; float:left; position: relative; margin-top:350px; z-index: 1000;}
下面我们通过添加小圈来美化label。我们添加一个虚假元素并且居中:
.cr-container label:before{ content:''; width: 34px; height: 34px; background: rgba(130,195,217,0.9); position: absolute; left: 50%; margin-left: -17px; border-radius: 50%; box-shadow: 0px 0px 0px 4px rgba(255,255,255,0.3); z-index:-1;}
为了创建一个分割我们需要使用一些小技巧。我们为label来创建另外一个虚假元素并且扩展到整个面板。使用渐变,我们将直线向上淡出:
.cr-container label:after{ width: 1px; height: 400px; content: ''; background: linear-gradient(top, rgba(255,255,255,0) 0%,rgba(255,255,255,1) 100%); position: absolute; bottom: -20px; right: 0px;}
最后面板需要去除那个直线,所以设置为宽度为0:
.cr-container label.cr-label-img-4:after{ width:0px;}
现在,我们将处理label,将input隐藏:
.cr-container input{ display:none;}
不管我们是否点击label,分开的输入都会被checked。现在我们将使用一个统一的sibling属性选择器来处理分开的label。因此我们修改选择的label颜色:
.cr-container input.cr-selector-img-1:checked ~ label.cr-label-img-1,.cr-container input.cr-selector-img-2:checked ~ label.cr-label-img-2,.cr-container input.cr-selector-img-3:checked ~ label.cr-label-img-3,.cr-container input.cr-selector-img-4:checked ~ label.cr-label-img-4{ color: #68abc2;}
同时我们修改背景颜色和box阴影:
.cr-container input.cr-selector-img-1:checked ~ label.cr-label-img-1:before,.cr-container input.cr-selector-img-2:checked ~ label.cr-label-img-2:before,.cr-container input.cr-selector-img-3:checked ~ label.cr-label-img-3:before,.cr-container input.cr-selector-img-4:checked ~ label.cr-label-img-4:before{ background:#fff; box-shadow: 0px 0px 0px 4px rgba(104,171,194,0.6);}
图片面板的容器将会占据所有宽度并且绝对定位。这个容器将会在稍后使用为了将图片设置为选择的图片。我们需要这样做来使得图片缺省可以显示。因此我们将添加已经背景属性:
.cr-bgimg{ width: 600px; height: 400px; position: absolute; left: 0px; top: 0px; z-index: 1; background-repeat: no-repeat; background-position: 0 0;}
因为我们有4个面板/图片,一个面板将有150px的宽度(600除4)。面板会左漂移,我们隐藏overflow因为我们不想看到块出现:
.cr-bgimg div{ width:150px; height: 100%; position: relative; float: left; overflow:hidden; background-repeat: no-repeat;}
每一个显示块都是初始绝对定位,他们将通过left:-150px来被隐藏:
.cr-bgimg div span{ position: absolute; width: 100%; height: 100%; top: 0px; left: -150px; z-index: 2; text-indent: -9000px;}
接下来是背景图片容器和单独的图片显示块:
.cr-container input.cr-selector-img-1:checked ~ .cr-bgimg,.cr-bgimg div span:nth-child(1){ background-image: url(../images/1.jpg);}.cr-container input.cr-selector-img-2:checked ~ .cr-bgimg,.cr-bgimg div span:nth-child(2){ background-image: url(../images/2.jpg);}.cr-container input.cr-selector-img-3:checked ~ .cr-bgimg,.cr-bgimg div span:nth-child(3){ background-image: url(../images/3.jpg);}.cr-container input.cr-selector-img-4:checked ~ .cr-bgimg,.cr-bgimg div span:nth-child(4){ background-image: url(../images/4.jpg);}
我们需要根据面板来设置图片块到正确位置:
.cr-bgimg div:nth-child(1) span{ background-position: 0px 0px;}.cr-bgimg div:nth-child(2) span{ background-position: -150px 0px;}.cr-bgimg div:nth-child(3) span{ background-position: -300px 0px;}.cr-bgimg div:nth-child(4) span{ background-position: -450px 0px;}
当我们点击label时我们简单的移动所有内容块到右边
.cr-container input:checked ~ .cr-bgimg div span{ animation: slideOut 0.6s ease-in-out;}@keyframes slideOut{ 0%{ left: 0px; } 100%{ left: 150px; }}
所有的块都使用分开的图片。将从-150px到0px:
.cr-container input.cr-selector-img-1:checked ~ .cr-bgimg div span:nth-child(1),.cr-container input.cr-selector-img-2:checked ~ .cr-bgimg div span:nth-child(2),.cr-container input.cr-selector-img-3:checked ~ .cr-bgimg div span:nth-child(3),.cr-container input.cr-selector-img-4:checked ~ .cr-bgimg div span:nth-child(4){ transition: left 0.5s ease-in-out; animation: none; left: 0px; z-index: 10;}
最后是需要给h3标题设定样式。h3将有opacity transition,并且一旦我们选择分开的label/input,opactiy会由0变为1:
.cr-titles h3{ position: absolute; width: 100%; text-align: center; top: 50%; z-index: 10000; opacity: 0; color: #fff; text-shadow:1px 1px 1px rgba(0,0,0,0.1); transition: opacity 0.8s ease-in-out;}.cr-titles h3 span:nth-child(1){ font-family:'BebasNeueRegular', 'Arial Narrow', Arial, sans-serif; font-size: 70px; display: block; letter-spacing: 7px;}.cr-titles h3 span:nth-child(2){ letter-spacing: 0px; display: block; background: rgba(104,171,194,0.9); font-size: 14px; padding: 10px; font-style: italic; font-family: Cambria, Palatino, "Palatino Linotype", "Palatino LT STD", Georgia, serif;}.cr-container input.cr-selector-img-1:checked ~ .cr-titles h3:nth-child(1),.cr-container input.cr-selector-img-2:checked ~ .cr-titles h3:nth-child(2),.cr-container input.cr-selector-img-3:checked ~ .cr-titles h3:nth-child(3),.cr-container input.cr-selector-img-4:checked ~ .cr-titles h3:nth-child(4){ opacity: 1;}
如果你不想使用label技巧到移动设备,你可以使用media query:
@media screen and (max-width: 768px) { .cr-container input{ display: inline; width: 24%; margin-top: 350px; z-index: 1000; position: relative; } .cr-container label{ display: none; }}
只是一个快速的解决方式,最好查看是否支持!
希望大家喜欢!
via tympanus
来源:使用CSS3实现的超酷幻灯图片效果
【使用CSS3实现的超酷幻灯图片效果】相关文章: