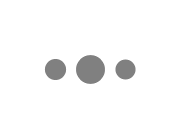
首先来看看效果图
实现过程如下
控制器调用就一句代码:
[self showLoadingInView:self.view];
方便控制器如此调用,就要为控制器添加一个分类
.h文件
#import <UIKit/UIKit.h> #import "GQCircleLoadView.h" @interface UIViewController (GQCircleLoad) //显示动画 - (void)showLoadingInView:(UIView*)view; //隐藏动画 - (void)hideLoad; @property (nonatomic,strong) GQCircleLoadView *loadingView; @end
.m文件
#import "UIViewController+GQCircleLoad.h" #import <objc/runtime.h> @implementation UIViewController (GQCircleLoad) - (GQCircleLoadView*)loadingView { return objc_getAssociatedObject(self, @"loadingView"); } - (void)setLoadingView:(GQCircleLoadView*)loadingView { objc_setAssociatedObject(self, @"loadingView", loadingView, OBJC_ASSOCIATION_RETAIN_NONATOMIC); } - (void)showLoadingInView:(UIView*)view{ if (self.loadingView == nil) { self.loadingView = [[GQCircleLoadView alloc]init]; } if (view) { [view addSubview:self.loadingView]; self.loadingView.frame = view.bounds; }else{ UIWindow *appKeyWindow = [UIApplication sharedApplication].keyWindow; [appKeyWindow addSubview:self.loadingView]; self.loadingView.frame = appKeyWindow.bounds; } } - (void)hideLoad{ [self.loadingView removeFromSuperview]; } @end
接下来就是GQCircleLoadView继承UIView,里面通过drawRect画出圆圈,并且动画的实现
#import "GQCircleLoadView.h" #define WINDOW_width [[UIScreen mainScreen] bounds].size.width #define WINDOW_height [[UIScreen mainScreen] bounds].size.height static NSInteger circleCount = 3; static CGFloat cornerRadius = 10; static CGFloat magin = 15; @interface GQCircleLoadView()<CAAnimationDelegate> @property (nonatomic, strong) NSMutableArray *layerArr; @end @implementation GQCircleLoadView - (instancetype)initWithFrame:(CGRect)frame{ if (self = [super initWithFrame:frame]) { self.backgroundColor = [UIColor clearColor]; } return self; } // 画圆 - (void)drawCircles{ for (NSInteger i = 0; i < circleCount; ++i) { CGFloat x = (WINDOW_width - (cornerRadius*2) * circleCount - magin * (circleCount-1)) / 2.0 + i * (cornerRadius*2 + magin) + cornerRadius; CGRect rect = CGRectMake(-cornerRadius, -cornerRadius , 2*cornerRadius, 2*cornerRadius); UIBezierPath *beizPath=[UIBezierPath bezierPathWithRoundedRect:rect cornerRadius:cornerRadius]; CAShapeLayer *layer=[CAShapeLayer layer]; layer.path=beizPath.CGPath; layer.fillColor=[UIColor grayColor].CGColor; layer.position = CGPointMake(x, self.frame.size.height * 0.5); [self.layer addSublayer:layer]; [self.layerArr addObject:layer]; } [self drawAnimation:self.layerArr[0]]; // 旋转(可打开试试效果) // CABasicAnimation* rotationAnimation = [CABasicAnimation animationWithKeyPath:@"transform.rotation.y"]; // rotationAnimation.toValue = [NSNumber numberWithFloat: - M_PI * 2.0 ]; // rotationAnimation.duration = 1; // rotationAnimation.cumulative = YES; // rotationAnimation.repeatCount = MAXFLOAT; // [self.layer addAnimation:rotationAnimation forKey:@"rotationAnimation"]; } // 动画实现 - (void)drawAnimation:(CALayer*)layer { CABasicAnimation *scaleUp = [CABasicAnimation animationWithKeyPath:@"transform.scale"]; scaleUp.fromValue = @1; scaleUp.toValue = @1.5; scaleUp.duration = 0.25; scaleUp.timingFunction = [CAMediaTimingFunction functionWithName:kCAMediaTimingFunctionEaseOut]; CABasicAnimation *scaleDown = [CABasicAnimation animationWithKeyPath:@"transform.scale"]; scaleDown.beginTime = scaleUp.duration; scaleDown.fromValue = @1.5; scaleDown.toValue = @1; scaleDown.duration = 0.25; scaleDown.timingFunction = [CAMediaTimingFunction functionWithName:kCAMediaTimingFunctionEaseOut]; CAAnimationGroup *group = [[CAAnimationGroup alloc] init]; group.animations = @[scaleUp, scaleDown]; group.repeatCount = 0; group.duration = scaleUp.duration + scaleDown.duration; group.delegate = self; [layer addAnimation:group forKey:@"groupAnimation"]; } #pragma mark - CAAnimationDelegate - (void)animationDidStart:(CAAnimation *)anim { if ([anim isKindOfClass:CAAnimationGroup.class]) { CAAnimationGroup *animation = (CAAnimationGroup *)anim; [self.layerArr enumerateObjectsUsingBlock:^(CAShapeLayer *obj, NSUInteger idx, BOOL * _Nonnull stop) { CAAnimationGroup *a0 = (CAAnimationGroup *)[obj animationForKey:@"groupAnimation"]; if (a0 && a0 == animation) { CAShapeLayer *nextlayer = self.layerArr[(idx+1)>=self.layerArr.count?0:(idx+1)]; [self performSelector:@selector(drawAnimation:) withObject:nextlayer afterDelay:0.25]; *stop = YES; } }]; } } - (void)drawRect:(CGRect)rect{ [super drawRect:rect]; [self drawCircles]; } - (NSMutableArray *)layerArr{ if (_layerArr == nil) { _layerArr = [[NSMutableArray alloc] init]; } return _layerArr; } @end
Demo就不上传了,总共四个文件代码已经全贴上了!
总结
以上就是这篇文章的全部内容了,有兴趣可以试试打开上面的旋转的动画代码,关闭旋转代码,进一步修改也可实现出QQ邮箱的下拉刷新效果,希望这篇文章的内容对大家的学习或者工作能带来一定的帮助,如果有疑问大家可以留言交流。
【iOS利用CALayer实现动画加载的效果】相关文章:
★ iOS应用中使用Auto Layout实现自定义cell及拖动回弹