先看最终效果:

教程开始:
Lets get started create a new document 496 x 496 pixels. Use your prefered background color, ive choses a nice light blue gradient background.
新建一个尺寸为496 x 496的文件。你可以用你喜欢的背景颜色。推荐使用浅蓝色的渐变。如图:
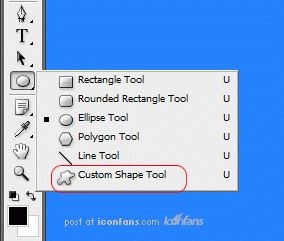
Select the custom shapes tool from the sidebar menu.
选择工具栏上的"自定义形状工具"
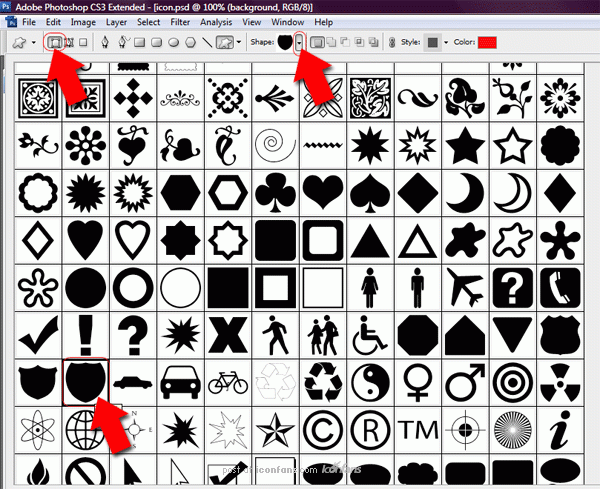
Select the sheild shape from the custom shapes libary, change to "shape layers" (see image below).
在属性栏上选择"形状图层",然后在"形状"中选择你需要的形状。(如果只有几个形状可以点击右边的小箭头追加全部的形状。你就会看到很多形状)
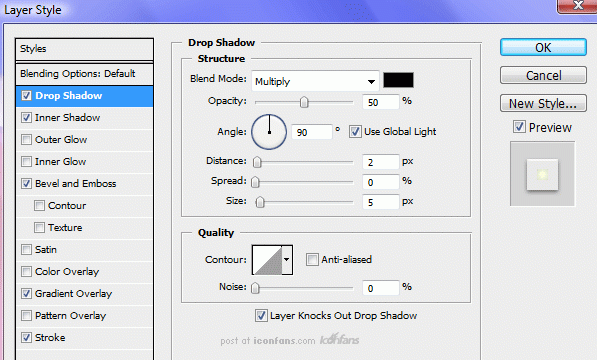
Using "shape layers" will retain the shapes quality when needed to resize your document at a later stage. Drag your sheild onto your canvas then add these layer styles.
使用"形状图层"将保留形状质量,以便于在后一阶段调整你的图像。然后给你的图像添加混合选项。如图:
【PS鼠绘盾牌图标】相关文章:
★ PhotoShop绘制简单的小铃铛APP Icon图标制作教程
★ PS鼠绘地雷图标