为了丰富我们的游戏,我们经常会给游戏中的角色(怪物)添加行走路线,本想用 ITweenPath 插件实现,但是一直没有找到合适的办法,因为不知道如何实现实行的获得地形高度,或者如果使用角色控制器移动(CharacterController),怎么使用 ITweenPath 驱动?本人愚笨,自己实现了个(这儿只是使用 ITweenPath 绘制出来的点),也算抛砖引玉,如果读者知道如何更简单的实现方式,还请告之!共同进步!
先来看看最终的效果图:
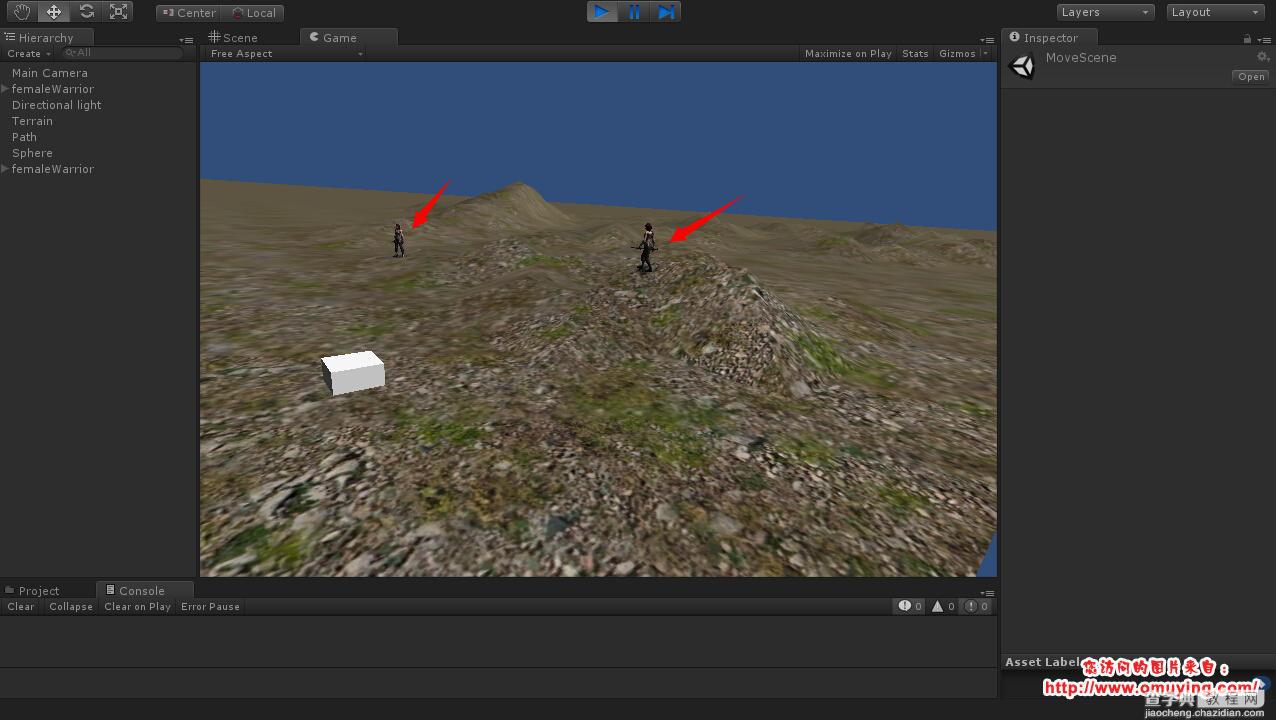
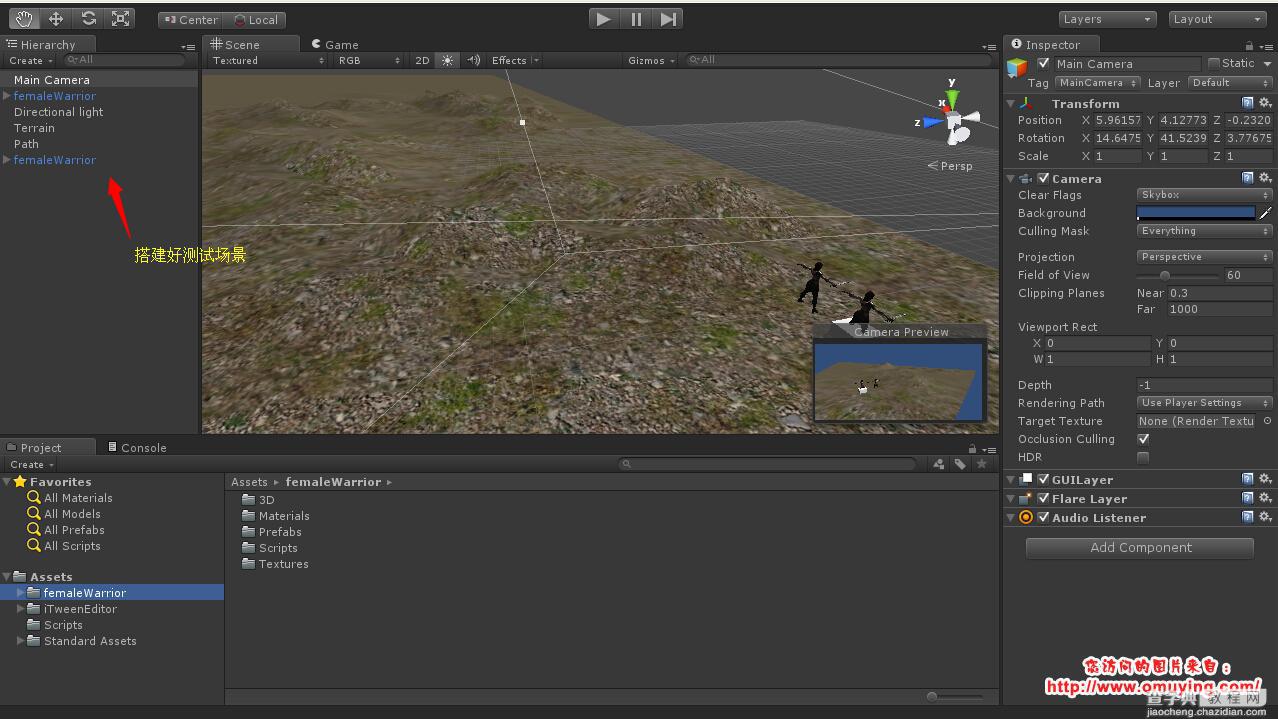
场景中有两个角色,然后他们会在 ITweenPath 绘制的线上随机移动!下面我们先搭建好测试的场景,如下图:
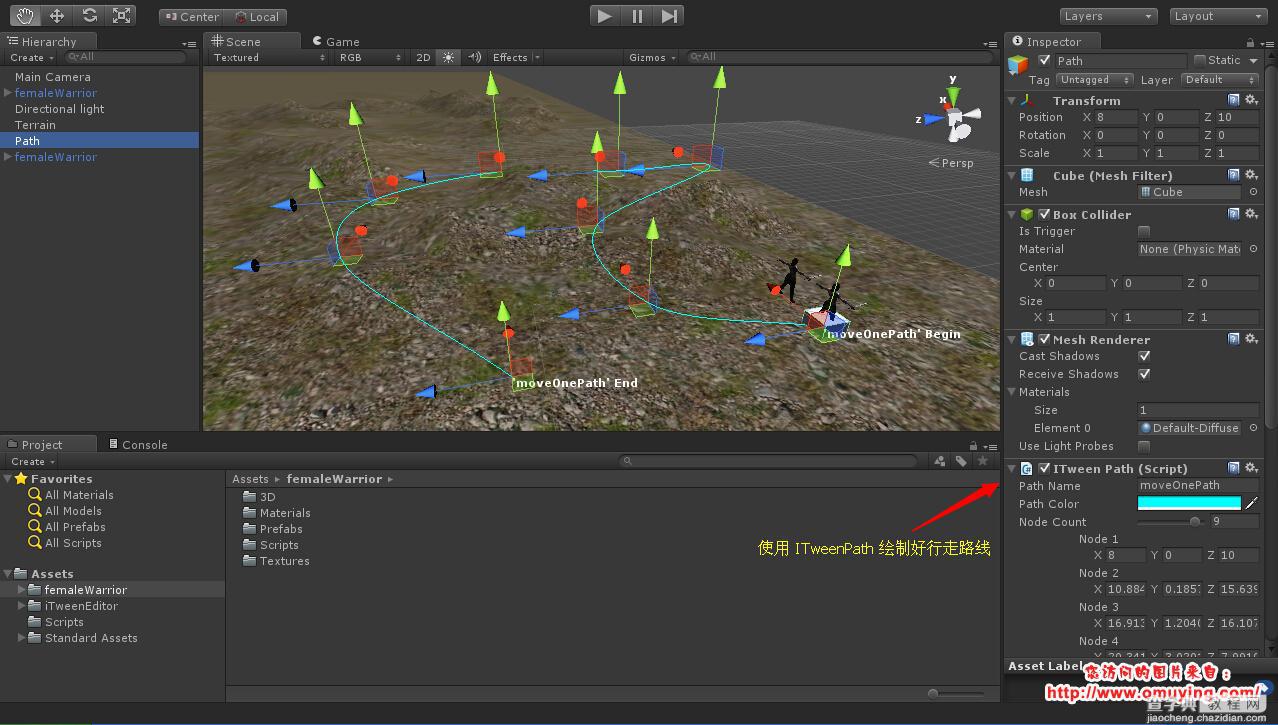
然后我们使用 ITweenEditor 编辑场景中角色的行进路线,如下图:
后面,就需要我们自己去实现行走的逻辑了,获取 ITweenPath 曲线上的点,前面的文章中提到,详细可以看此链接,然后我们新建立一个RoleController.cs 文件,然后编写我们的代码,全部代码如下:
using UnityEngine;
using System.Collections;
public class RoleController : MonoBehaviour
{
public iTweenPath tweenPath;
/// <summary>
/// 曲线上面点的个数,点数越多移动越平滑
/// </summary>
public int pointSize = 5;
/// <summary>
/// 角色移动速度
/// </summary>
public float speed = 3f;
public AnimationClip walkClip;
public AnimationClip idleClip;
private Vector3[] pathPositionList;
private Vector3 pathPoint;
private Vector3[] positionList;
private Vector3 nextPoint;
private Vector3 direction;
private int moveIndex;
private bool moveStatus;
private bool idleStatus;
private Animation animation;
void Awake()
{
this.pathPositionList = PointController.PointList(tweenPath.nodes.ToArray(), this.pointSize);
this.animation = this.GetComponent<Animation> ();
this.moveIndex = 0;
this.moveStatus = false;
this.idleStatus = false;
if (this.pathPositionList.Length > 0)
{
this.pathPoint = this.pathPositionList [Random.Range(0, this.pathPositionList.Length)];
}
}
void Start()
{
this.transform.position = this.GetTerrainPosition (this.pathPoint);
this.StartCoroutine(this.SetNextPositionList(0));
}
void Update()
{
this.SetMoveDirection ();
this.SetMovePosition ();
}
/// <summary>
/// 设置移动向量
/// </summary>
protected void SetMoveDirection()
{
if (this.positionList == null) return;
if (this.moveIndex < this.positionList.Length)
{
if(!this.moveStatus)
{
this.pathPoint = this.positionList[this.moveIndex];
this.nextPoint = this.GetTerrainPosition(this.pathPoint);
this.direction = (this.nextPoint - this.transform.position).normalized * this.speed;
if(this.direction != Vector3.zero)
{
this.transform.rotation = Quaternion.LookRotation(new Vector3(this.direction.x, 0f, this.direction.z));
this.moveStatus = true;
}else{
this.moveIndex ++;
}
}
}else
{
if(!idleStatus)
{
this.idleStatus = true;
this.animation.CrossFade (this.idleClip.name);
this.StartCoroutine(this.SetNextPositionList(5));
}
}
}
/// <summary>
/// 设置移动位置
/// </summary>
protected void SetMovePosition ()
{
if (this.positionList == null) return;
if (!this.IsArrivePosition ())
{
//this.characterController.Move(this.direction * Time.deltaTime); // 可以取消这句,并且注释下面那句,可以使用角色控制器进行移动
this.transform.position = GetTerrainPosition(this.transform.position + this.direction * Time.deltaTime);
} else {
this.transform.position = this.nextPoint;
this.moveStatus = false;
this.moveIndex ++;
}
}
protected IEnumerator SetNextPositionList(int sceond)
{
if (sceond > 0)
{
yield return new WaitForSeconds (5);
} else {
yield return null;
}
int index = this.GetIndexByList (this.pathPositionList, this.pathPoint);
if (index != -1)
{
int nextIndex = Random.Range(0, this.pathPositionList.Length);
if(index != nextIndex)
{
int beginIndex = index > nextIndex ? nextIndex : index;
int endIndex = index > nextIndex ? index : nextIndex;
Vector3[] positionList = new Vector3[endIndex - beginIndex];
int positionLength = positionList.Length;
if(index > nextIndex)
{
for(int pathIndex = endIndex, positionIndex = 0; pathIndex >= beginIndex && positionIndex < positionLength; pathIndex --, positionIndex ++)
{
positionList[positionIndex] = this.pathPositionList[pathIndex];
}
}else{
for(int pathIndex = beginIndex, positionIndex = 0; pathIndex <= endIndex && positionIndex < positionLength; pathIndex ++, positionIndex ++)
{
positionList[positionIndex] = this.pathPositionList[pathIndex];
}
}
this.moveIndex = 0;
this.moveStatus = false;
this.idleStatus = false;
this.animation.CrossFade (this.walkClip.name);
this.positionList = positionList;
}
}
}
/// <summary>
/// 获取点帖地位置
/// </summary>
/// <returns>The terrion position.</returns>
/// <param name="position">Position.</param>
private Vector3 GetTerrainPosition(Vector3 position)
{
Vector3 terrainPosition = new Vector3 (position.x, position.y, position.z);
terrainPosition.y = Terrain.activeTerrain.SampleHeight (terrainPosition);
return terrainPosition;
}
/// <summary>
/// 是否到达指定位置
/// </summary>
/// <returns><c>true</c> if this instance is arrive position; otherwise, <c>false</c>.</returns>
private bool IsArrivePosition()
{
Vector3 currentDirection = (this.nextPoint - (this.transform.position + this.direction * Time.deltaTime)).normalized;
if (this.CalculateNormalized (currentDirection) == this.CalculateNormalized (this.direction) * -1)
{
return true;
}
return false;
}
/// <summary>
/// 计算向量标准
/// </summary>
/// <returns>The normalized.</returns>
/// <param name="data">Data.</param>
private Vector3 CalculateNormalized(Vector3 data)
{
Vector3 position = Vector3.zero;
position.x = data.x >= 0 ? 1 : -1;
position.z = data.z >= 0 ? 1 : -1;
return position;
}
private int GetIndexByList(Vector3[] positionList, Vector3 position)
{
int index = 0;
foreach (Vector3 item in positionList)
{
if(item.x == position.x && item.y == position.y && item.z == position.z) return index;
index ++;
}
return -1;
}
}
然后我们给场景中的角色挂载RoleController.cs 脚本,并且设置好相关属性,如下图:
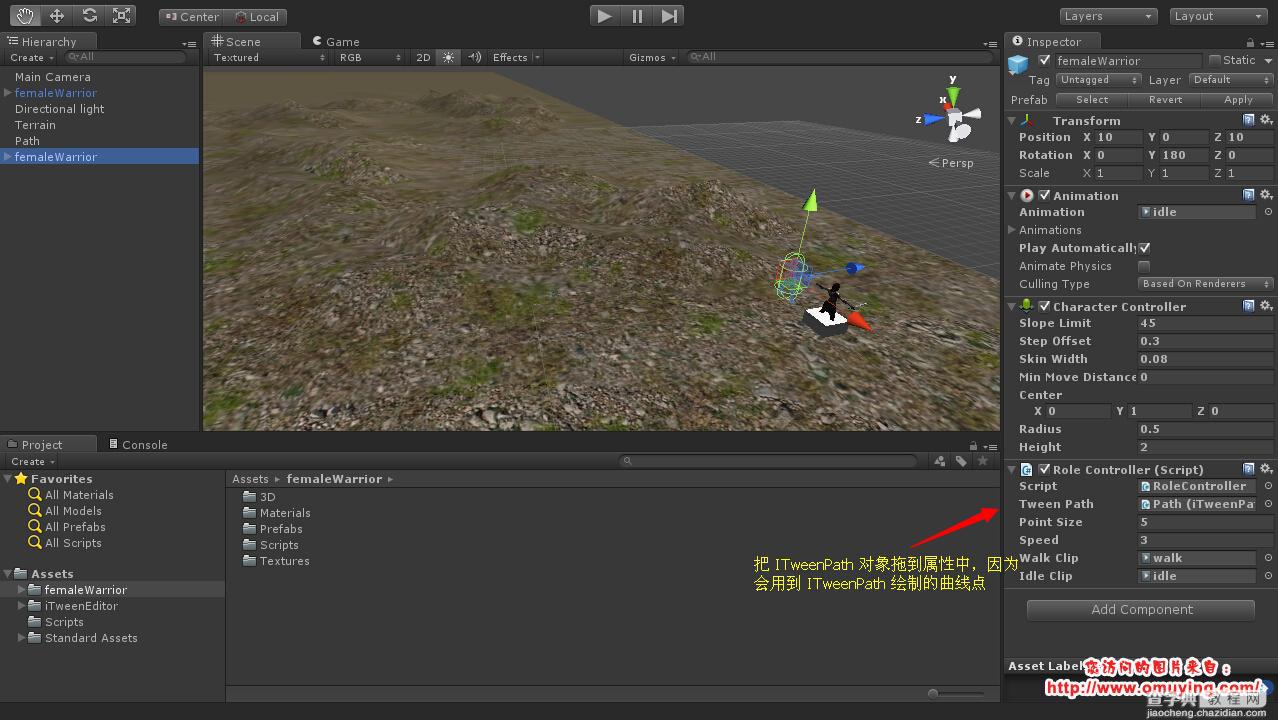
最后运行游戏,就可以看到角色在场景中按线路行走了!
百度网盘下载地址:http://pan.baidu.com/s/1c0EOOnA 密码: l4d5
【Unity3D 实现怪物巡逻、按路线行走操作】相关文章:
★ Dreamweaver中如何设置热区?DW设置热区方法图解
★ eclipse和myeclipse安装教程及eclipse汉化教程(图文)