Android 自定义View时使用TypedArray配置样式属性详细介绍
在自定义view时为了提高复用性和扩展性,可以为自定义的view添加样式属性的配置,比如自定义图片资源、文字大小、控件属性等,就这需要用到TypedArray类,下面以一个自定义的可点击扩展和收缩的TextView为例记录下这个类的简单使用。
先上效果图:
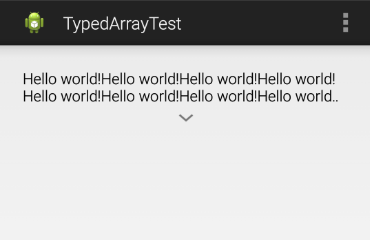
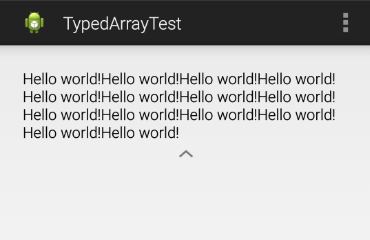
点击以后为
再贴代码:
1.自定义view类;
/** * @title ExpandTextView * @description 可扩展TextView,可以通过设置ExpandTextViewStyle来自定义展开图片、收起图片和最小展示的行数 */ public class ExpandTextView extends LinearLayout implements OnClickListener { /** * 默认最少展示的行数 */ private int defaultMinLines; /** * 是否展开 */ private boolean mCollapsed = true; /** * 是否重新布局 */ private boolean mRelayout = false; private View expandView; private TextView expandText; private ImageView expandImg; private Drawable mExpandDrawable; private Drawable mCollapseDrawable; public ExpandTextView(Context context) { this(context, null); } public ExpandTextView(Context context, AttributeSet attrs) { super(context, attrs); init(attrs); } private void init(AttributeSet attrs) { expandView = LayoutInflater.from(getContext()).inflate( R.layout.pt__expand_textview, null); expandText = (TextView) expandView.findViewById(R.id.expand_text); expandText.setOnClickListener(this); expandImg = (ImageView) expandView.findViewById(R.id.expand_img); expandImg.setOnClickListener(this); TypedArray a = getContext().obtainStyledAttributes(attrs, R.styleable.ExpandTextViewStyle); // 自定义图片资源 mExpandDrawable = getResources().getDrawable( a.getResourceId(R.styleable.ExpandTextViewStyle_expand, R.drawable.pt__ic_expand)); expandImg.setBackgroundDrawable(mExpandDrawable); mCollapseDrawable = getResources().getDrawable( a.getResourceId(R.styleable.ExpandTextViewStyle_collapse, R.drawable.pt__ic_collapse)); // 自定义最小行数 defaultMinLines = a.getInt( R.styleable.ExpandTextViewStyle_default_min_lines, 2); a.recycle(); LinearLayout.LayoutParams params = new LayoutParams( LayoutParams.FILL_PARENT, LayoutParams.WRAP_CONTENT); params.gravity = Gravity.CENTER; addView(expandView, params); } @Override protected void onMeasure(int widthMeasureSpec, int heightMeasureSpec) { if (!mRelayout) { super.onMeasure(widthMeasureSpec, heightMeasureSpec); return; } mRelayout = false; expandText.setMaxLines(Integer.MAX_VALUE); expandImg.setVisibility(View.GONE); super.onMeasure(widthMeasureSpec, heightMeasureSpec); if (expandText.getLineCount() <= defaultMinLines) { return; } if (mCollapsed) { expandText.setMaxLines(defaultMinLines); } expandImg.setVisibility(View.VISIBLE); super.onMeasure(widthMeasureSpec, heightMeasureSpec); } public void setText(CharSequence text) { mRelayout = true; expandText.setText(text); } public void setText(int resId) { this.setText(getContext().getString(resId)); } @Override public void onClick(View view) { if (expandImg.getVisibility() != View.VISIBLE) { return; } mCollapsed = !mCollapsed; expandImg.setBackgroundDrawable(mCollapsed ? mExpandDrawable : mCollapseDrawable); expandText .setMaxLines(mCollapsed ? defaultMinLines : Integer.MAX_VALUE); } }
2.在res/values下添加的attrs.xml文件中定义样式属性;
<resources> <> <declare-styleable name="ExpandTextViewStyle"> <> <attr name="expand" format="reference" /> <> <attr name="collapse" format="reference" /> <> <attr name="default_min_lines" format="integer" /> </declare-styleable> </resources>
3.在res/values下的style.xml文件中定义样式,可替换图片资源;
<> <style name="ExpandTextViewStyle"> <item name="expand">@drawable/pt__ic_expand</item> <item name="collapse">@drawable/pt__ic_collapse</item> <item name="default_min_lines">3</item> </style>
4.布局文件;
<RelativeLayout xmlns:android="http://schemas.android.com/apk/res/android" xmlns:custom="http://schemas.android.com/apk/res/com.example.typedarraytest" android:layout_width="match_parent" android:layout_height="match_parent" android:paddingBottom="@dimen/activity_vertical_margin" android:paddingLeft="@dimen/activity_horizontal_margin" android:paddingRight="@dimen/activity_horizontal_margin" android:paddingTop="@dimen/activity_vertical_margin" > <com.example.typedarraytest.ExpandTextView android:id="@+id/expand_text_view" android:layout_width="fill_parent" android:layout_height="wrap_content" android:layout_margin="8dp" custom:default_min_lines="2" /> </RelativeLayout>
下面简单描述下实现步骤:
1.先定义好attrs.xml文件;
2.在自定义view类中获取定义的样式属性,下面这几行代码是关键:
TypedArray a = getContext().obtainStyledAttributes(attrs, R.styleable.ExpandTextViewStyle); // 自定义图片资源 mExpandDrawable = getResources().getDrawable( a.getResourceId(R.styleable.ExpandTextViewStyle_expand, R.drawable.pt__ic_expand)); expandImg.setBackgroundDrawable(mExpandDrawable); mCollapseDrawable = getResources().getDrawable( a.getResourceId(R.styleable.ExpandTextViewStyle_collapse, R.drawable.pt__ic_collapse)); // 自定义最小行数 defaultMinLines = a.getInt( R.styleable.ExpandTextViewStyle_default_min_lines, 2); a.recycle();
3.既可以直接在style.xml中定义样式然后使用,也可以在布局文件中配置属性:
custom:default_min_lines="2"
要使用上面的属性,需要在布局文件的根节点中添加如下属性:
xmlns:custom=http://schemas.android.com/apk/res/com.example.typedarraytest
格式:xmlns:自定义关键字(用于在控件中使用属性,同android)=http://schemas.android.com/apk/res/包名
感谢阅读,希望能帮助到大家,谢谢大家对本站的支持!
【Android 自定义View时使用TypedArray配置样式属性详细介绍】相关文章:
★ Android 布局控件之LinearLayout详细介绍
★ android开发中ListView与Adapter使用要点介绍
★ Android变形(Transform)之Camera使用介绍
★ Android自定义Adapter的ListView的思路及代码