这里我们将采取的方案是使用组合View的方式,先自定义一个布局继承自LinearLayout,然后在这个布局中加入下拉头和ListView这两个子元素,并让这两个子元素纵向排列。初始化的时候,让下拉头向上偏移出屏幕,这样我们看到的就只有ListView了。然后对ListView的touch事件进行监听,如果当前ListView已经滚动到顶部并且手指还在向下拉的话,那就将下拉头显示出来,松手后进行刷新操作,并将下拉头隐藏。那我们现在就来动手实现一下,新建一个项目起名叫PullToRefreshTest,先在项目中定义一个下拉头的布局文件pull_to_refresh.xml,代码如下所示:
<RelativeLayout xmlns:android="http://schemas.android.com/apk/res/android" xmlns:tools="http://schemas.android.com/tools" android:id="@+id/pull_to_refresh_head" android:layout_width="fill_parent" android:layout_height="dip" > <LinearLayout android:layout_width="dip" android:layout_height="dip" android:layout_centerInParent="true" android:orientation="horizontal" > <RelativeLayout android:layout_width="dip" android:layout_height="dip" android:layout_weight="" > <ImageView android:id="@+id/arrow" android:layout_width="wrap_content" android:layout_height="wrap_content" android:layout_centerInParent="true" android:src="@drawable/arrow" /> <ProgressBar android:id="@+id/progress_bar" android:layout_width="dip" android:layout_height="dip" android:layout_centerInParent="true" android:visibility="gone" /> </RelativeLayout> <LinearLayout android:layout_width="dip" android:layout_height="dip" android:layout_weight="" android:orientation="vertical" > <TextView android:id="@+id/description" android:layout_width="fill_parent" android:layout_height="dip" android:layout_weight="" android:gravity="center_horizontal|bottom" android:text="@string/pull_to_refresh" /> <TextView android:id="@+id/updated_at" android:layout_width="fill_parent" android:layout_height="dip" android:layout_weight="" android:gravity="center_horizontal|top" android:text="@string/updated_at" /> </LinearLayout> </LinearLayout> </RelativeLayout>
•在这个布局中,我们包含了一个下拉指示箭头,一个下拉状态文字提示,和一个上次更新的时间。当然,还有一个隐藏的旋转进度条,只有正在刷新的时候我们才会将它显示出来。布局中所有引用的字符串我们都放在strings.xml中,如下所示:
<" encoding="utf-"?> <resources> <string name="app_name">PullToRefreshTest</string> <string name="pull_to_refresh">下拉可以刷新</string> <string name="release_to_refresh">释放立即刷新</string> <string name="refreshing">正在刷新…</string> <string name="not_updated_yet">暂未更新过</string> <string name="updated_at">上次更新于%$s前</string> <string name="updated_just_now">刚刚更新</string> <string name="time_error">时间有问题</string> </resources>
•然后新建一个RefreshableView继承自LinearLayout,代码如下所示:
public class RefreshableView extends LinearLayout implements OnTouchListener { //下拉状态 public static final int STATUS_PULL_TO_REFRESH = ; //释放立即刷新状态 public static final int STATUS_RELEASE_TO_REFRESH = //正在刷新状态 public static final int STATUS_REFRESHING = ; //刷新完成或未刷新状态 public static final int STATUS_REFRESH_FINISHED = ; //下拉头部回滚的速度 public static final int SCROLL_SPEED = -; //一分钟的毫秒值,用于判断上次的更新时间 public static final long ONE_MINUTE = * ; //一小时的毫秒值,用于判断上次的更新时间 public static final long ONE_HOUR = * ONE_MINUTE; //一天的毫秒值,用于判断上次的更新时间 public static final long ONE_DAY = * ONE_HOUR; //一月的毫秒值,用于判断上次的更新时间 public static final long ONE_MONTH = * ONE_DAY; //一年的毫秒值,用于判断上次的更新时间 public static final long ONE_YEAR = * ONE_MONTH; //上次更新时间的字符串常量,用于作为SharedPreferences的键值 private static final String UPDATED_AT = "updated_at"; //下拉刷新的回调接口 private PullToRefreshListener mListener; //用于存储上次更新时间 private SharedPreferences preferences; //下拉头的View private View header; //需要去下拉刷新的ListView private ListView listView; //刷新时显示的进度条 private ProgressBar progressBar; //指示下拉和释放的箭头 private ImageView arrow; //指示下拉和释放的文字描述 private TextView description; //上次更新时间的文字描述 private TextView updateAt; //下拉头的布局参数 private MarginLayoutParams headerLayoutParams; //上次更新时间的毫秒值 private long lastUpdateTime; //为了防止不同界面的下拉刷新在上次更新时间上互相有冲突,使用id来做区分 private int mId = -; //下拉头的高度 private int hideHeaderHeight; //当前处理什么状态,可选值有STATUS_PULL_TO_REFRESH,STATUS_RELEASE_TO_REFRESH,STATUS_REFRESHING 和 STATUS_REFRESH_FINISHED private int currentStatus = STATUS_REFRESH_FINISHED;; //记录上一次的状态是什么,避免进行重复操作 private int lastStatus = currentStatus; //手指按下时的屏幕纵坐标 private float yDown; //在被判定为滚动之前用户手指可以移动的最大值。 private int touchSlop; //是否已加载过一次layout,这里onLayout中的初始化只需加载一次 private boolean loadOnce; //当前是否可以下拉,只有ListView滚动到头的时候才允许下拉 private boolean ableToPull; //下拉刷新控件的构造函数,会在运行时动态添加一个下拉头的布局。 public RefreshableView(Context context, AttributeSet attrs) { super(context, attrs); preferences = PreferenceManager.getDefaultSharedPreferences(context); header = LayoutInflater.from(context).inflate(R.layout.pull_to_refresh, null, true); progressBar = (ProgressBar) header.findViewById(R.id.progress_bar); arrow = (ImageView) header.findViewById(R.id.arrow); description = (TextView) header.findViewById(R.id.description); updateAt = (TextView) header.findViewById(R.id.updated_at); touchSlop = ViewConfiguration.get(context).getScaledTouchSlop(); refreshUpdatedAtValue(); setOrientation(VERTICAL); addView(header, ); } //进行一些关键性的初始化操作,比如:将下拉头向上偏移进行隐藏,给ListView注册touch事件。 protected void onLayout(boolean changed, int l, int t, int r, int b) { super.onLayout(changed, l, t, r, b); if (changed && !loadOnce) { hideHeaderHeight = -header.getHeight(); headerLayoutParams = (MarginLayoutParams) header.getLayoutParams(); headerLayoutParams.topMargin = hideHeaderHeight; listView = (ListView) getChildAt(); listView.setOnTouchListener(this); loadOnce = true; } } //当ListView被触摸时调用,其中处理了各种下拉刷新的具体逻辑。 public boolean onTouch(View v, MotionEvent event) { setIsAbleToPull(event); if (ableToPull) { switch (event.getAction()) { case MotionEvent.ACTION_DOWN: yDown = event.getRawY(); break; case MotionEvent.ACTION_MOVE: float yMove = event.getRawY(); int distance = (int) (yMove - yDown); // 如果手指是下滑状态,并且下拉头是完全隐藏的,就屏蔽下拉事件 if (distance <= && headerLayoutParams.topMargin <= hideHeaderHeight) { return false; } if (distance < touchSlop) { return false; } if (currentStatus != STATUS_REFRESHING) { if (headerLayoutParams.topMargin > ) { currentStatus = STATUS_RELEASE_TO_REFRESH; } else { currentStatus = STATUS_PULL_TO_REFRESH; } // 通过偏移下拉头的topMargin值,来实现下拉效果 headerLayoutParams.topMargin = (distance / ) + hideHeaderHeight; header.setLayoutParams(headerLayoutParams); } break; case MotionEvent.ACTION_UP: default: if (currentStatus == STATUS_RELEASE_TO_REFRESH) { // 松手时如果是释放立即刷新状态,就去调用正在刷新的任务 new RefreshingTask().execute(); } else if (currentStatus == STATUS_PULL_TO_REFRESH) { // 松手时如果是下拉状态,就去调用隐藏下拉头的任务 new HideHeaderTask().execute(); } break; } // 时刻记得更新下拉头中的信息 if (currentStatus == STATUS_PULL_TO_REFRESH || currentStatus == STATUS_RELEASE_TO_REFRESH) { updateHeaderView(); // 当前正处于下拉或释放状态,要让ListView失去焦点,否则被点击的那一项会一直处于选中状态 listView.setPressed(false); listView.setFocusable(false); listView.setFocusableInTouchMode(false); lastStatus = currentStatus; // 当前正处于下拉或释放状态,通过返回true屏蔽掉ListView的滚动事件 return true; } } return false; } //给下拉刷新控件注册一个监听器。 //为了防止不同界面的下拉刷新在上次更新时间上互相有冲突, 请不同界面在注册下拉刷新监听器时一定要传入不同的id。 public void setOnRefreshListener(PullToRefreshListener listener, int id) { mListener = listener; mId = id; } // 当所有的刷新逻辑完成后,记录调用一下,否则你的ListView将一直处于正在刷新状态。 public void finishRefreshing() { currentStatus = STATUS_REFRESH_FINISHED; preferences.edit().putLong(UPDATED_AT + mId, System.currentTimeMillis()).commit(); new HideHeaderTask().execute(); } //根据当前ListView的滚动状态来设定 {@link #ableToPull}的值,每次都需要在onTouch中第一个执行,这样可以判断出当前应该是滚动ListView,还是应该进行下拉。 private void setIsAbleToPull(MotionEvent event) { View firstChild = listView.getChildAt(); if (firstChild != null) { int firstVisiblePos = listView.getFirstVisiblePosition(); if (firstVisiblePos == && firstChild.getTop() == ) { if (!ableToPull) { yDown = event.getRawY(); } // 如果首个元素的上边缘,距离父布局值为,就说明ListView滚动到了最顶部,此时应该允许下拉刷新 ableToPull = true; } else { if (headerLayoutParams.topMargin != hideHeaderHeight) { headerLayoutParams.topMargin = hideHeaderHeight; header.setLayoutParams(headerLayoutParams); } ableToPull = false; } } else { // 如果ListView中没有元素,也应该允许下拉刷新 ableToPull = true; } } //更新下拉头中的信息。 private void updateHeaderView() { if (lastStatus != currentStatus) { if (currentStatus == STATUS_PULL_TO_REFRESH) { description.setText(getResources().getString(R.string.pull_to_refresh)); arrow.setVisibility(View.VISIBLE); progressBar.setVisibility(View.GONE); rotateArrow(); } else if (currentStatus == STATUS_RELEASE_TO_REFRESH) { description.setText(getResources().getString(R.string.release_to_refresh)); arrow.setVisibility(View.VISIBLE); progressBar.setVisibility(View.GONE); rotateArrow(); } else if (currentStatus == STATUS_REFRESHING) { description.setText(getResources().getString(R.string.refreshing)); progressBar.setVisibility(View.VISIBLE); arrow.clearAnimation(); arrow.setVisibility(View.GONE); } refreshUpdatedAtValue(); } } //根据当前的状态来旋转箭头。 private void rotateArrow() { float pivotX = arrow.getWidth() / f; float pivotY = arrow.getHeight() / f; float fromDegrees = f; float toDegrees = f; if (currentStatus == STATUS_PULL_TO_REFRESH) { fromDegrees = f; toDegrees = f; } else if (currentStatus == STATUS_RELEASE_TO_REFRESH) { fromDegrees = f; toDegrees = f; } RotateAnimation animation = new RotateAnimation(fromDegrees, toDegrees, pivotX, pivotY); animation.setDuration(); animation.setFillAfter(true); arrow.startAnimation(animation); } //刷新下拉头中上次更新时间的文字描述。 private void refreshUpdatedAtValue() { lastUpdateTime = preferences.getLong(UPDATED_AT + mId, -); long currentTime = System.currentTimeMillis(); long timePassed = currentTime - lastUpdateTime; long timeIntoFormat; String updateAtValue; if (lastUpdateTime == -) { updateAtValue = getResources().getString(R.string.not_updated_yet); } else if (timePassed < ) { updateAtValue = getResources().getString(R.string.time_error); } else if (timePassed < ONE_MINUTE) { updateAtValue = getResources().getString(R.string.updated_just_now); } else if (timePassed < ONE_HOUR) { timeIntoFormat = timePassed / ONE_MINUTE; String value = timeIntoFormat + "分钟"; updateAtValue = String.format(getResources().getString(R.string.updated_at), value); } else if (timePassed < ONE_DAY) { timeIntoFormat = timePassed / ONE_HOUR; String value = timeIntoFormat + "小时"; updateAtValue = String.format(getResources().getString(R.string.updated_at), value); } else if (timePassed < ONE_MONTH) { timeIntoFormat = timePassed / ONE_DAY; String value = timeIntoFormat + "天"; updateAtValue = String.format(getResources().getString(R.string.updated_at), value); } else if (timePassed < ONE_YEAR) { timeIntoFormat = timePassed / ONE_MONTH; String value = timeIntoFormat + "个月"; updateAtValue = String.format(getResources().getString(R.string.updated_at), value); } else { timeIntoFormat = timePassed / ONE_YEAR; String value = timeIntoFormat + "年"; updateAtValue = String.format(getResources().getString(R.string.updated_at), value); } updateAt.setText(updateAtValue); } //正在刷新的任务,在此任务中会去回调注册进来的下拉刷新监听器。 class RefreshingTask extends AsyncTask<Void, Integer, Void> { protected Void doInBackground(Void... params) { int topMargin = headerLayoutParams.topMargin; while (true) { topMargin = topMargin + SCROLL_SPEED; if (topMargin <= ) { topMargin = ; break; } publishProgress(topMargin); sleep(); } currentStatus = STATUS_REFRESHING; publishProgress(); if (mListener != null) { mListener.onRefresh(); } return null; } protected void onProgressUpdate(Integer... topMargin) { updateHeaderView(); headerLayoutParams.topMargin = topMargin[]; header.setLayoutParams(headerLayoutParams); } } //隐藏下拉头的任务,当未进行下拉刷新或下拉刷新完成后,此任务将会使下拉头重新隐藏。 class HideHeaderTask extends AsyncTask<Void, Integer, Integer> { protected Integer doInBackground(Void... params) { int topMargin = headerLayoutParams.topMargin; while (true) { topMargin = topMargin + SCROLL_SPEED; if (topMargin <= hideHeaderHeight) { topMargin = hideHeaderHeight; break; } publishProgress(topMargin); sleep(); } return topMargin; } protected void onProgressUpdate(Integer... topMargin) { headerLayoutParams.topMargin = topMargin[]; header.setLayoutParams(headerLayoutParams); } protected void onPostExecute(Integer topMargin) { headerLayoutParams.topMargin = topMargin; header.setLayoutParams(headerLayoutParams); currentStatus = STATUS_REFRESH_FINISHED; } } //使当前线程睡眠指定的毫秒数。指定当前线程睡眠多久,以毫秒为单位 private void sleep(int time) { try { Thread.sleep(time); } catch (InterruptedException e) { e.printStackTrace(); } } //下拉刷新的监听器,使用下拉刷新的地方应该注册此监听器来获取刷新回调。 public interface PullToRefreshListener { //刷新时会去回调此方法,在方法内编写具体的刷新逻辑。注意此方法是在子线程中调用的, 你可以不必另开线程来进行耗时操作。 void onRefresh(); } }
•这个类是整个下拉刷新功能中最重要的一个类,注释已经写得比较详细了,我再简单解释一下。首先在RefreshableView的构造函数中动态添加了刚刚定义的pull_to_refresh这个布局作为下拉头,然后在onLayout方法中将下拉头向上偏移出了屏幕,再给ListView注册了touch事件。之后每当手指在ListView上滑动时,onTouch方法就会执行。在onTouch方法中的第一行就调用了setIsAbleToPull方法来判断ListView是否滚动到了最顶部,只有滚动到了最顶部才会执行后面的代码,否则就视为正常的ListView滚动,不做任何处理。当ListView滚动到了最顶部时,如果手指还在向下拖动,就会改变下拉头的偏移值,让下拉头显示出来,下拉的距离设定为手指移动距离的1/2,这样才会有拉力的感觉。如果下拉的距离足够大,在松手的时候就会执行刷新操作,如果距离不够大,就仅仅重新隐藏下拉头。
•具体的刷新操作会在RefreshingTask中进行,其中在doInBackground方法中回调了PullToRefreshListener接口的onRefresh方法,这也是大家在使用RefreshableView时必须要去实现的一个接口,因为具体刷新的逻辑就应该写在onRefresh方法中,后面会演示使用的方法。
•另外每次在下拉的时候都还会调用updateHeaderView方法来改变下拉头中的数据,比如箭头方向的旋转,下拉文字描述的改变等。更加深入的理解请大家仔细去阅读RefreshableView中的代码。
现在我们已经把下拉刷新的所有功能都完成了,接下来就要看一看如何在项目中引入下拉刷新了。打开或新建activity_main.xml作为程序主界面的布局,加入如下代码:
<RelativeLayout xmlns:android="http://schemas.android.com/apk/res/android" xmlns:tools="http://schemas.android.com/tools" android:layout_width="match_parent" android:layout_height="match_parent" tools:context=".MainActivity" > <com.example.pulltorefreshtest.RefreshableView android:id="@+id/refreshable_view" android:layout_width="fill_parent" android:layout_height="fill_parent" > <ListView android:id="@+id/list_view" android:layout_width="fill_parent" android:layout_height="fill_parent" > </ListView> </com.example.pulltorefreshtest.RefreshableView> </RelativeLayout>
•可以看到,我们在自定义的RefreshableView中加入了一个ListView,这就意味着给这个ListView加入了下拉刷新的功能,就是这么简单!然后我们再来看一下程序的主Activity,打开或新建MainActivity,加入如下代码:
public class MainActivity extends Activity { RefreshableView refreshableView; ListView listView; ArrayAdapter<String> adapter; String[] items = { "A", "B", "C", "D", "E", "F", "G", "H", "I", "J", "K", "L" }; protected void onCreate(Bundle savedInstanceState) { super.onCreate(savedInstanceState); requestWindowFeature(Window.FEATURE_NO_TITLE); setContentView(R.layout.activity_main); refreshableView = (RefreshableView) findViewById(R.id.refreshable_view); listView = (ListView) findViewById(R.id.list_view); adapter = new ArrayAdapter<String>(this, android.R.layout.simple_list_item_, items); listView.setAdapter(adapter); refreshableView.setOnRefreshListener(new PullToRefreshListener() { public void onRefresh() { try { Thread.sleep(); } catch (InterruptedException e) { e.printStackTrace(); } refreshableView.finishRefreshing(); } }, ); } }
•可以看到,我们通过调用RefreshableView的setOnRefreshListener方法注册了一个监听器,当ListView正在刷新时就会回调监听器的onRefresh方法,刷新的具体逻辑就在这里处理。而且这个方法已经自动开启了线程,可以直接在onRefresh方法中进行耗时操作,比如向服务器请求最新数据等,在这里我就简单让线程睡眠3秒钟。另外在onRefresh方法的最后,一定要调用RefreshableView中的finishRefreshing方法,这个方法是用来通知RefreshableView刷新结束了,不然我们的ListView将一直处于正在刷新的状态。
•不知道大家有没有注意到,setOnRefreshListener这个方法其实是有两个参数的,我们刚刚也是传入了一个不起眼的0。那这第二个参数是用来做什么的呢?由于RefreshableView比较智能,它会自动帮我们记录上次刷新完成的时间,然后下拉的时候会在下拉头中显示距上次刷新已过了多久。这是一个非常好用的功能,让我们不用再自己手动去记录和计算时间了,但是却存在一个问题。
•如果当前我们的项目中有三个地方都使用到了下拉刷新的功能,现在在一处进行了刷新,其它两处的时间也都会跟着改变!因为刷新完成的时间是记录在配置文件中的,由于在一处刷新更改了配置文件,导致在其它两处读取到的配置文件时间已经是更改过的了。
•那解决方案是什么?就是每个用到下拉刷新的地方,给setOnRefreshListener方法的第二个参数中传入不同的id就行了。这样各处的上次刷新完成时间都是单独记录的,相互之间就不会再有影响。
•让我们来运行一下,看看效果吧。
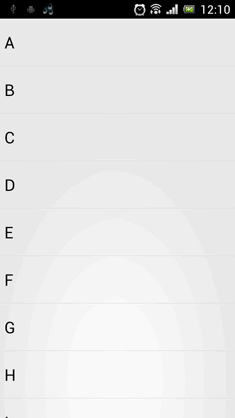
•效果看起来还是非常不错的。我们最后再来总结一下,在项目中引入ListView下拉刷新功能只需三步:
1.在Activity的布局文件中加入自定义的RefreshableView,并让ListView包含在其中。
2.在Activity中调用RefreshableView的setOnRefreshListener方法注册回调接口。
3.在onRefresh方法的最后,记得调用RefreshableView的finishRefreshing方法,通知刷新结束。
【安卓(android)怎么实现下拉刷新】相关文章: