本文详细分析了Android中Service服务。分享给大家供大家参考,具体如下:
在前面文章《Android中Service服务详解(一)》中,我们介绍了服务的启动和停止,是调用Context的startService和stopService方法。还有另外一种启动方式和停止方式,即绑定服务和解绑服务,这种方式使服务与启动服务的活动之间的关系更为紧密,可以在活动中告诉服务去做什么事情。
为了说明这种情况,做如下工作:
1、修改Service服务类MyService
package com.example.testservice; import android.app.Service; import android.content.Intent; import android.os.Binder; import android.os.IBinder; import android.util.Log; import android.widget.Toast; public class MyService extends Service { //创建自己的绑定服务业务逻辑 class MusicBinder extends Binder{ public void ready(){ Log.d("MyService", "----ready Method---"); } public void play(){ Log.d("MyService", "----play Method---"); } } private MusicBinder musicBinder = new MusicBinder(); @Override public IBinder onBind(Intent arg0) { Toast.makeText(this, "服务的onBind方法被调用", Toast.LENGTH_SHORT).show(); return musicBinder; } /** * 服务第一次创建的时候调用 */ @Override public void onCreate() { super.onCreate(); Toast.makeText(this, "服务的onCreate方法被调用", Toast.LENGTH_SHORT).show(); } /** * 服务每一次启动的时候调用 */ @Override public int onStartCommand(Intent intent, int flags, int startId) { Toast.makeText(this, "服务的onStartCommand方法被调用", Toast.LENGTH_SHORT).show(); return super.onStartCommand(intent, flags, startId); } @Override public void onDestroy() { Toast.makeText(this, "服务的onDestroy方法被调用", Toast.LENGTH_SHORT).show(); super.onDestroy(); } }
在服务类中,添加了内部类MusicBinder,在该内部类中,我们模拟了两个方法。同时在onBind方法中返回我们内部类实例。
2、修改布局文件activity_main.xml
<LinearLayout xmlns:android="http://schemas.android.com/apk/res/android" android:layout_width="fill_parent" android:layout_height="fill_parent" android:orientation="vertical" > <Button android:id="@+id/button1" android:layout_width="match_parent" android:layout_height="wrap_content" android:text="启动服务" /> <Button android:id="@+id/button2" android:layout_width="match_parent" android:layout_height="wrap_content" android:text="停止服务" /> <Button android:id="@+id/button3" android:layout_width="match_parent" android:layout_height="wrap_content" android:text="绑定服务" /> <Button android:id="@+id/button4" android:layout_width="match_parent" android:layout_height="wrap_content" android:text="解绑服务" /> </LinearLayout>
即添加了两个按钮:“绑定服务”和“解绑服务”按钮。
3、修改MainActivity.java文件
package com.example.testservice; import com.example.testservice.MyService.MusicBinder; import android.app.Activity; import android.content.ComponentName; import android.content.Intent; import android.content.ServiceConnection; import android.os.Bundle; import android.os.IBinder; import android.view.Menu; import android.view.View; import android.view.View.OnClickListener; import android.widget.Button; public class MainActivity extends Activity implements OnClickListener{ private Button startService_Button; private Button stopService_Button; private Button bindService_Button; private Button unbindService_Button; private MyService.MusicBinder musicBinder; //创建ServiceConnection,在绑定服务的时候会用到。 private ServiceConnection connection = new ServiceConnection() { @Override public void onServiceDisconnected(ComponentName service) { } @Override public void onServiceConnected(ComponentName name, IBinder service) { //类型转换 musicBinder = (MyService.MusicBinder) service; //指挥服务需要做的工作 musicBinder.ready(); musicBinder.play(); } }; @Override protected void onCreate(Bundle savedInstanceState) { super.onCreate(savedInstanceState); setContentView(R.layout.activity_main); //获取开启服务按钮 startService_Button = (Button) findViewById(R.id.button1); //获取停止服务按钮 stopService_Button = (Button) findViewById(R.id.button2); //获取绑定服务按钮 bindService_Button = (Button) findViewById(R.id.button3); //获取解绑服务按钮 unbindService_Button = (Button) findViewById(R.id.button4); //调用点击事件 startService_Button.setOnClickListener(this); stopService_Button.setOnClickListener(this); bindService_Button.setOnClickListener(this); unbindService_Button.setOnClickListener(this); } /** * 点击事件 */ @Override public void onClick(View view) { switch(view.getId()){ case R.id.button1: //“开启服务”按钮 Intent startIntent = new Intent(this,MyService.class); //开启服务 startService(startIntent); break; case R.id.button2: //“停止服务”按钮 Intent stopIntent = new Intent(this,MyService.class); //停止服务 stopService(stopIntent); break; case R.id.button3: //“绑定服务”按钮 Intent bindIntent = new Intent(this,MyService.class); bindService(bindIntent, connection, BIND_AUTO_CREATE); break; case R.id.button4: //“解绑服务”按钮 Intent unbindIntent = new Intent(this,MyService.class); unbindService(connection); break; default: break; } } @Override public boolean onCreateOptionsMenu(Menu menu) { // Inflate the menu; this adds items to the action bar if it is present. getMenuInflater().inflate(R.menu.main, menu); return true; } }
在该类中,创建了ServiceConnection的匿名类,即当活动和服务建立连接后,需要做的工作,在onServiceConnected方法中我们进行了绑定服务的类型转换,然后调用相应的业务逻辑方法。
活动和服务的绑定石在onClick方法中实现的:使用bindService方法进行绑定,使MainActivity活动和MyService服务绑定在一起,其中第三个参数是个标志位,此处表示在活动和服务进行绑定后自动创建服务。
活动和服务的解绑使用方法unbindService。
4、测试
点击“绑定服务”后,如下:

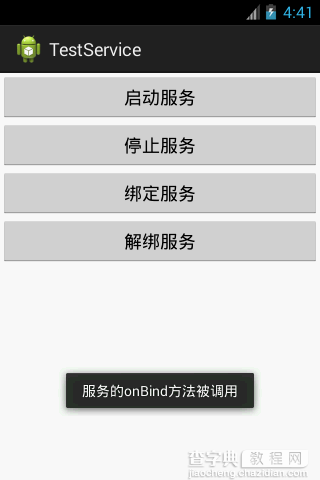
同时会执行ready和play方法,会在日志中打印出来。
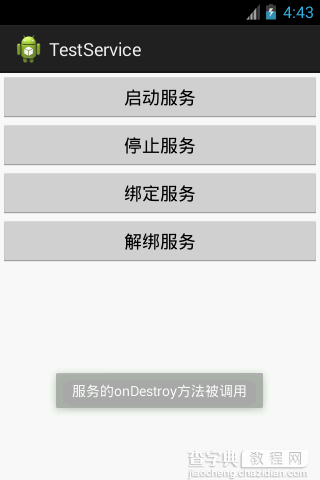
点击“解绑服务”后,如下:
总结:使用这种方式绑定服务的流程如下:
Context的bindService方法--》服务的onCreate方法--》服务的onBind方法--》服务运行。
解绑服务流程如下:
服务运行--》Context的unBindService方法--》服务的onDestroy方法--》服务停止。
希望本文所述对大家Android程序设计有所帮助。
【Android中Service服务详解(二)】相关文章:
★ 在android中ScrollView嵌套ScrollView解决方案
★ android中Intent传值与Bundle传值的区别详解