本文实例讲述了Android编程之单元测试用法。分享给大家供大家参考,具体如下:
在实际开发中,开发android软件的过程需要不断地进行测试。使用Junint测试框架,是正规Android开发的必用技术,在Junint中可以得到组件,可以模拟发送事件和检测程序处理的正确性。单元测试是嵌入到项目中;也可以作为一个单独的项目争对某个具体项目进行测试。
第一步:首先在AndroidManifest.xml中加入下面红色代码:
<manifest xmlns:android="http://schemas.android.com/apk/res/android"
package="com.lee0000.test" android:versionCode="1" android:versionName="1.0">
<application android:icon="@drawable/icon" android:label="@string/app_name">
<uses-library android:name="android.test.runner"/>
</application>
<use-sdk android:minSdkVersion="6"/>
<instrumentation android:name="android.test.instrumentationTestRunner" android:targetPackage="com.lee0000.test" android:label="Tests"/>
***上面targetPackage指定的包要和应用的package相同。
第二步:编写单元测试代码,一般对将要测试的方法命名testXXX。需要测试的时候选择大纲(Outline视图)选择测试的方法右键点击,选择"Run As" - "Android Junit Test"。
例:
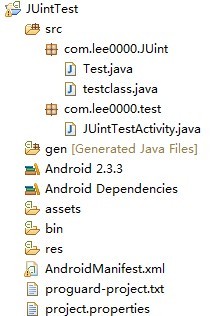
项目结构:
AndroidManifest.xml文件:
<"1.0" encoding="utf-8"?> <manifest xmlns:android="http://schemas.android.com/apk/res/android" package="com.lee0000.test" android:versionCode="1" android:versionName="1.0" > <uses-sdk android:minSdkVersion="15" /> <application android:icon="@drawable/ic_launcher" android:label="@string/app_name" > <activity android:name=".JUintTestActivity" android:label="@string/app_name" > <intent-filter> <action android:name="android.intent.action.MAIN" /> <category android:name="android.intent.category.LAUNCHER" /> </intent-filter> </activity> <uses-library android:name="android.test.runner" /> </application> <instrumentation android:name="android.test.InstrumentationTestRunner" android:targetPackage="com.lee0000.test" android:label="Tests"/> </manifest>
定义测试的两个方法:
public class testclass { public void str(String s){ System.out.println(s.substring(6)); } public int add(int a,int b){ return a+b; } }
一般继承的是AndroidTestCase,测试的时候就是测试这两个方法,如果在对应方法中选择"Run As" - "Android Junit Test"时出错,可以右键Test类,选择"Run as" - "Run Configurations",在 Instrumentation runner中选择:
import junit.framework.Assert; import android.test.AndroidTestCase; public class Test extends AndroidTestCase{ public void teststr() throws Exception{ testclass tc = new testclass(); tc.str("null"); } public void testadd(){ testclass tc = new testclass(); int t = tc.add(1, 2); Assert.assertEquals(3, t); } }
希望本文所述对大家Android程序设计有所帮助。
【Android编程之单元测试实例分析】相关文章: