本文实例讲述了Android实现九宫格(GridView中各项平分空间)的方法。分享给大家供大家参考。具体如下:
项目需要做一个九宫格(也不一定是9的,4宫格、16宫格、4x3宫格。。。),封了 一个宫格,它能够根据为它分配的空间来自动的调节宫中各项的尺寸。
从TableLayout集成来的,因此如果你直接在设计器上使用该封装的话需要把它自动加进去的那几个TableRow删除一下。
类名为AdvancedGridView,代码如下:
import android.content.Context; import android.util.AttributeSet; import android.view.View; import android.widget.BaseAdapter; import android.widget.Button; import android.widget.TableLayout; import android.widget.TableRow; /** * AdvancedGridView * @author RobinTang * @time 2012-10-15 */ public class AdvancedGridView extends TableLayout { // private static final String tag = "AdvancedGridView"; private int rowNum = 0; // row number private int colNum = 0; // col number private BaseAdapter adapter = null; private Context context = null; public AdvancedGridView(Context context) { super(context); initThis(context, null); } public AdvancedGridView(Context context, AttributeSet attrs) { super(context, attrs); initThis(context, attrs); } private void initThis(Context context, AttributeSet attrs) { this.context = context; if (this.getTag() != null) { String atb = (String) this.getTag(); int ix = atb.indexOf(','); if (ix > 0) { rowNum = Integer.parseInt(atb.substring(0, ix)); colNum = Integer.parseInt(atb.substring(ix+1, atb.length())); } } if (rowNum <= 0) rowNum = 3; if (colNum <= 0) colNum = 3; if(this.isInEditMode()){ this.removeAllViews(); for(int y=0; y<rowNum; ++y){ TableRow row = new TableRow(context); row.setLayoutParams(new LayoutParams(LayoutParams.FILL_PARENT, LayoutParams.FILL_PARENT, 1.0f)); for(int x=0; x<colNum; ++x){ View button = new Button(context); row.addView(button, new TableRow.LayoutParams (LayoutParams.MATCH_PARENT, LayoutParams.MATCH_PARENT, 1.0f)); } this.addView(row); } } } public BaseAdapter getAdapter() { return adapter; } public void setAdapter(BaseAdapter adapter) { if(adapter != null){ if(adapter.getCount() < this.rowNum*this.colNum){ throw new IllegalArgumentException("The view count of adapter is less than this gridview's items"); } this.removeAllViews(); for(int y=0; y<rowNum; ++y){ TableRow row = new TableRow(context); row.setLayoutParams(new LayoutParams(LayoutParams.FILL_PARENT, LayoutParams.FILL_PARENT, 1.0f)); for(int x=0; x<colNum; ++x){ View view = adapter.getView(y*colNum+x, this, row); row.addView(view, new TableRow.LayoutParams (LayoutParams.MATCH_PARENT, LayoutParams.MATCH_PARENT, 1.0f)); } this.addView(row); } } this.adapter = adapter; } public int getRowNum() { return rowNum; } public void setRowNum(int rowNum) { this.rowNum = rowNum; } public int getColNum() { return colNum; } public void setColNum(int colNum) { this.colNum = colNum; } }
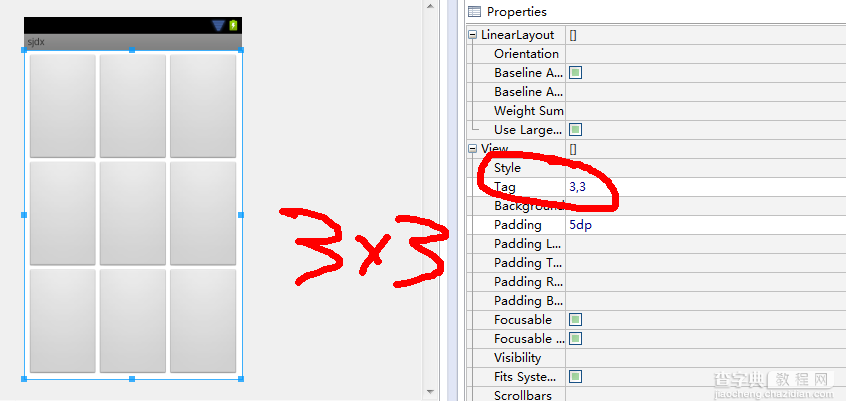
如果你想在设计阶段就看到宫格效果的话,你可以在该空间的Tag属性上设置行列个数。比如我想看到3x3的宫格样子的话就设置成"3,3",如下图,当然你也可以在代码中使用setRowNum()和setColNum()来进行设置,但是请在设置适配器前调用这两个方法。
希望本文所述对大家的Android程序设计有所帮助。
【Android实现九宫格(GridView中各项平分空间)的方法】相关文章:
★ 在Android中创建菜单项Menu以及获取手机分辨率的解决方法
★ Android开发笔记之:在ImageView上绘制圆环的实现方法
★ android动态布局之动态加入TextView和ListView的方法