AnimationListener听名字就知道是对Animation设置监听器,说简单点就是在Animation动画效果开始执行前,执行完毕和重复执行时可以触发监听器,从而执行对应的函数。
开发环境为android4.1.
AnimaitonListener的使用方法主要是在Animation上设置一个监听器,即采用Animation的方法成员setAnimationListener().其参数就是监听器的函数。
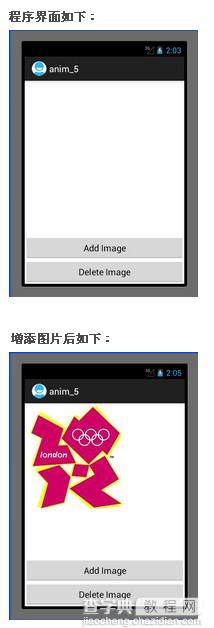
现在来说说本次实验的功能,主要有2个按钮,一个是增加图片的按钮,一个是删除图片的按钮,还有一个ImageView的控件,用来显示图片的。当增加图片的按钮按下时,图片会以无到全尺寸的尺寸大小变化出现,而删除按钮按下时,图片会从全尺寸到0尺寸逐渐退出,最后删除掉。
程序界面如下:
这里值得一提的是ViewGroup这个控件,感觉就是Layout控件一样,本次实验的图片控件ImageView里面的图片的增加和删除就是采用的ViewGrop中的addView()和removeView()方法。这2种方法里面传入的参数就是ImageView.
另外,Mars老师资料中在增加图片监听器函数中,重新定义了一个ImageView,重新把这个ImageView加入到ViewGroup中,这样会导致一个问题,那就是当我们把图片删除后且又重新加载后就删除不掉了,因为我们在删除的时候删的是布局文件中的ImageView,但是增加按钮增加的是另外一个ImageView,所以我们虽然删除掉了布局文件中的ImageView,但是屏幕上还是会显示图片的。因此解决的方法就是在增加按钮函数中直接使用布局文件中的ImageView,这样程序中可以一直增加图片和删除图片,且在屏幕中还能看到效果。
程序主要代码如下:
MainActivity.java:
复制代码 代码如下:
package com.example.anim_5;
import android.app.Activity;
import android.os.Bundle;
import android.view.Menu;
import android.view.View;
import android.view.View.OnClickListener;
import android.view.ViewGroup;
import android.view.ViewGroup.LayoutParams;
import android.view.animation.Animation;
import android.view.animation.Animation.AnimationListener;
import android.view.animation.ScaleAnimation;
import android.widget.Button;
import android.widget.ImageView;
public class MainActivity extends Activity {
private Button add = null;
private Button delete = null;
private ViewGroup viewgroup = null;
private ImageView imageview = null;
@Override
public void onCreate(Bundle savedInstanceState) {
super.onCreate(savedInstanceState);
setContentView(R.layout.activity_main);
add = (Button)findViewById(R.id.add);
delete = (Button)findViewById(R.id.delete);
imageview = (ImageView)findViewById(R.id.image);
viewgroup = (ViewGroup)findViewById(R.id.main_layout);
add.setOnClickListener(new AddOnClickListener());
delete.setOnClickListener(new DeleteOnClickListener());
}
private class AddOnClickListener implements OnClickListener{
public void onClick(View v) {
// TODO Auto-generated method stub
//数字后面必须全部加f,否则报错
ScaleAnimation animation = new ScaleAnimation(0.0f, 1.0f, 0.0f, 1.0f,
Animation.RELATIVE_TO_SELF, 0.5f,
Animation.RELATIVE_TO_SELF, 0.5f);
animation.setStartOffset(500);
animation.setDuration(1000);
// ImageView image_add = new ImageView(MainActivity.this);
// image_add.setImageResource(R.drawable.london_olympic);
// viewgroup.addView(image_add, new LayoutParams(LayoutParams.WRAP_CONTENT, LayoutParams.WRAP_CONTENT));
// image_add.setAnimation(animation);
//还是直接用布局文件中的ImageView比较好,否则加入的图片用后面的方法视觉上是删不掉的
//这里是采用setImageResource方法加载图片到ImageView控件上的。
imageview.setImageResource(R.drawable.london_olympic);
//用ViewGroup将ImageView加载到activity中
viewgroup.addView(imageview, new LayoutParams(LayoutParams.WRAP_CONTENT, LayoutParams.WRAP_CONTENT));
//启动ImageView的Animation
imageview.startAnimation(animation);
}
}
private class DeleteOnClickListener implements OnClickListener{
public void onClick(View v) {
// TODO Auto-generated method stub
ScaleAnimation animation = new ScaleAnimation(1.0f, 0.0f, 1.0f, 0.0f,
Animation.RELATIVE_TO_SELF, 0.5f,
Animation.RELATIVE_TO_SELF, 0.5f);
animation.setStartOffset(500);
animation.setDuration(1000);
//设置AnimationListener
animation.setAnimationListener(new DeleteAnimationListener());
imageview.startAnimation(animation);
}
}
private class DeleteAnimationListener implements AnimationListener{
public void onAnimationEnd(Animation animation) {
// TODO Auto-generated method stub
viewgroup.removeView(imageview);
}
public void onAnimationRepeat(Animation animation) {
// TODO Auto-generated method stub
}
public void onAnimationStart(Animation animation) {
// TODO Auto-generated method stub
}
}
@Override
public boolean onCreateOptionsMenu(Menu menu) {
getMenuInflater().inflate(R.menu.activity_main, menu);
return true;
}
}
activity_main.xml:
复制代码 代码如下:
<RelativeLayout xmlns:android="http://schemas.android.com/apk/res/android"
xmlns:tools="http://schemas.android.com/tools"
android:id="@+id/main_layout"
android:layout_width="match_parent"
android:layout_height="match_parent" >
<Button
android:id="@+id/delete"
android:layout_width="fill_parent"
android:layout_height="wrap_content"
android:layout_alignParentBottom="true"
android:text="Delete Image"
/>
<Button
android:id="@+id/add"
android:layout_width="fill_parent"
android:layout_height="wrap_content"
android:layout_above="@+id/delete"
android:text="Add Image" />
<ImageView
android:id= "@+id/image"
android:layout_width="wrap_content"
android:layout_height="310dip"
android:src="@drawable/london_olympic"
/>
</RelativeLayout>
总结:通过本次实验,可以了解到AnimationListener的基本使用方法。
作者:tornadomeet
【android Animation监听器AnimationListener的使用方法)】相关文章:
★ Android开发之ContentProvider的使用详解
★ Android中 自定义数据绑定适配器BaseAdapter的方法
★ Android HttpURLConnection.getResponseCode()错误解决方法